

Simple Ways to Get Crystal Clear Ice Every Time with GLAZER mini
You want perfect, clear ice every time. The GLAZER mini by ORI Future lets you make it at home. Use filtered water and chill it first. Keep your device clean. You get cool shapes and cubes that melt slowly. The ice comes out easily, making it great for cocktails or as one year anniversary gifts for him.
Key Takeaways
Use filtered or distilled water to make clear ice. This stops the ice from looking cloudy and makes it taste better. - Chill your water before you pour it into the mold. This easy step helps stop bubbles and makes the ice look clearer. - Keep your GLAZER mini clean and dry. Cleaning it often gives you perfect ice every time and helps your ice maker last longer.
Getting Started with GLAZER mini
Unboxing and Setup
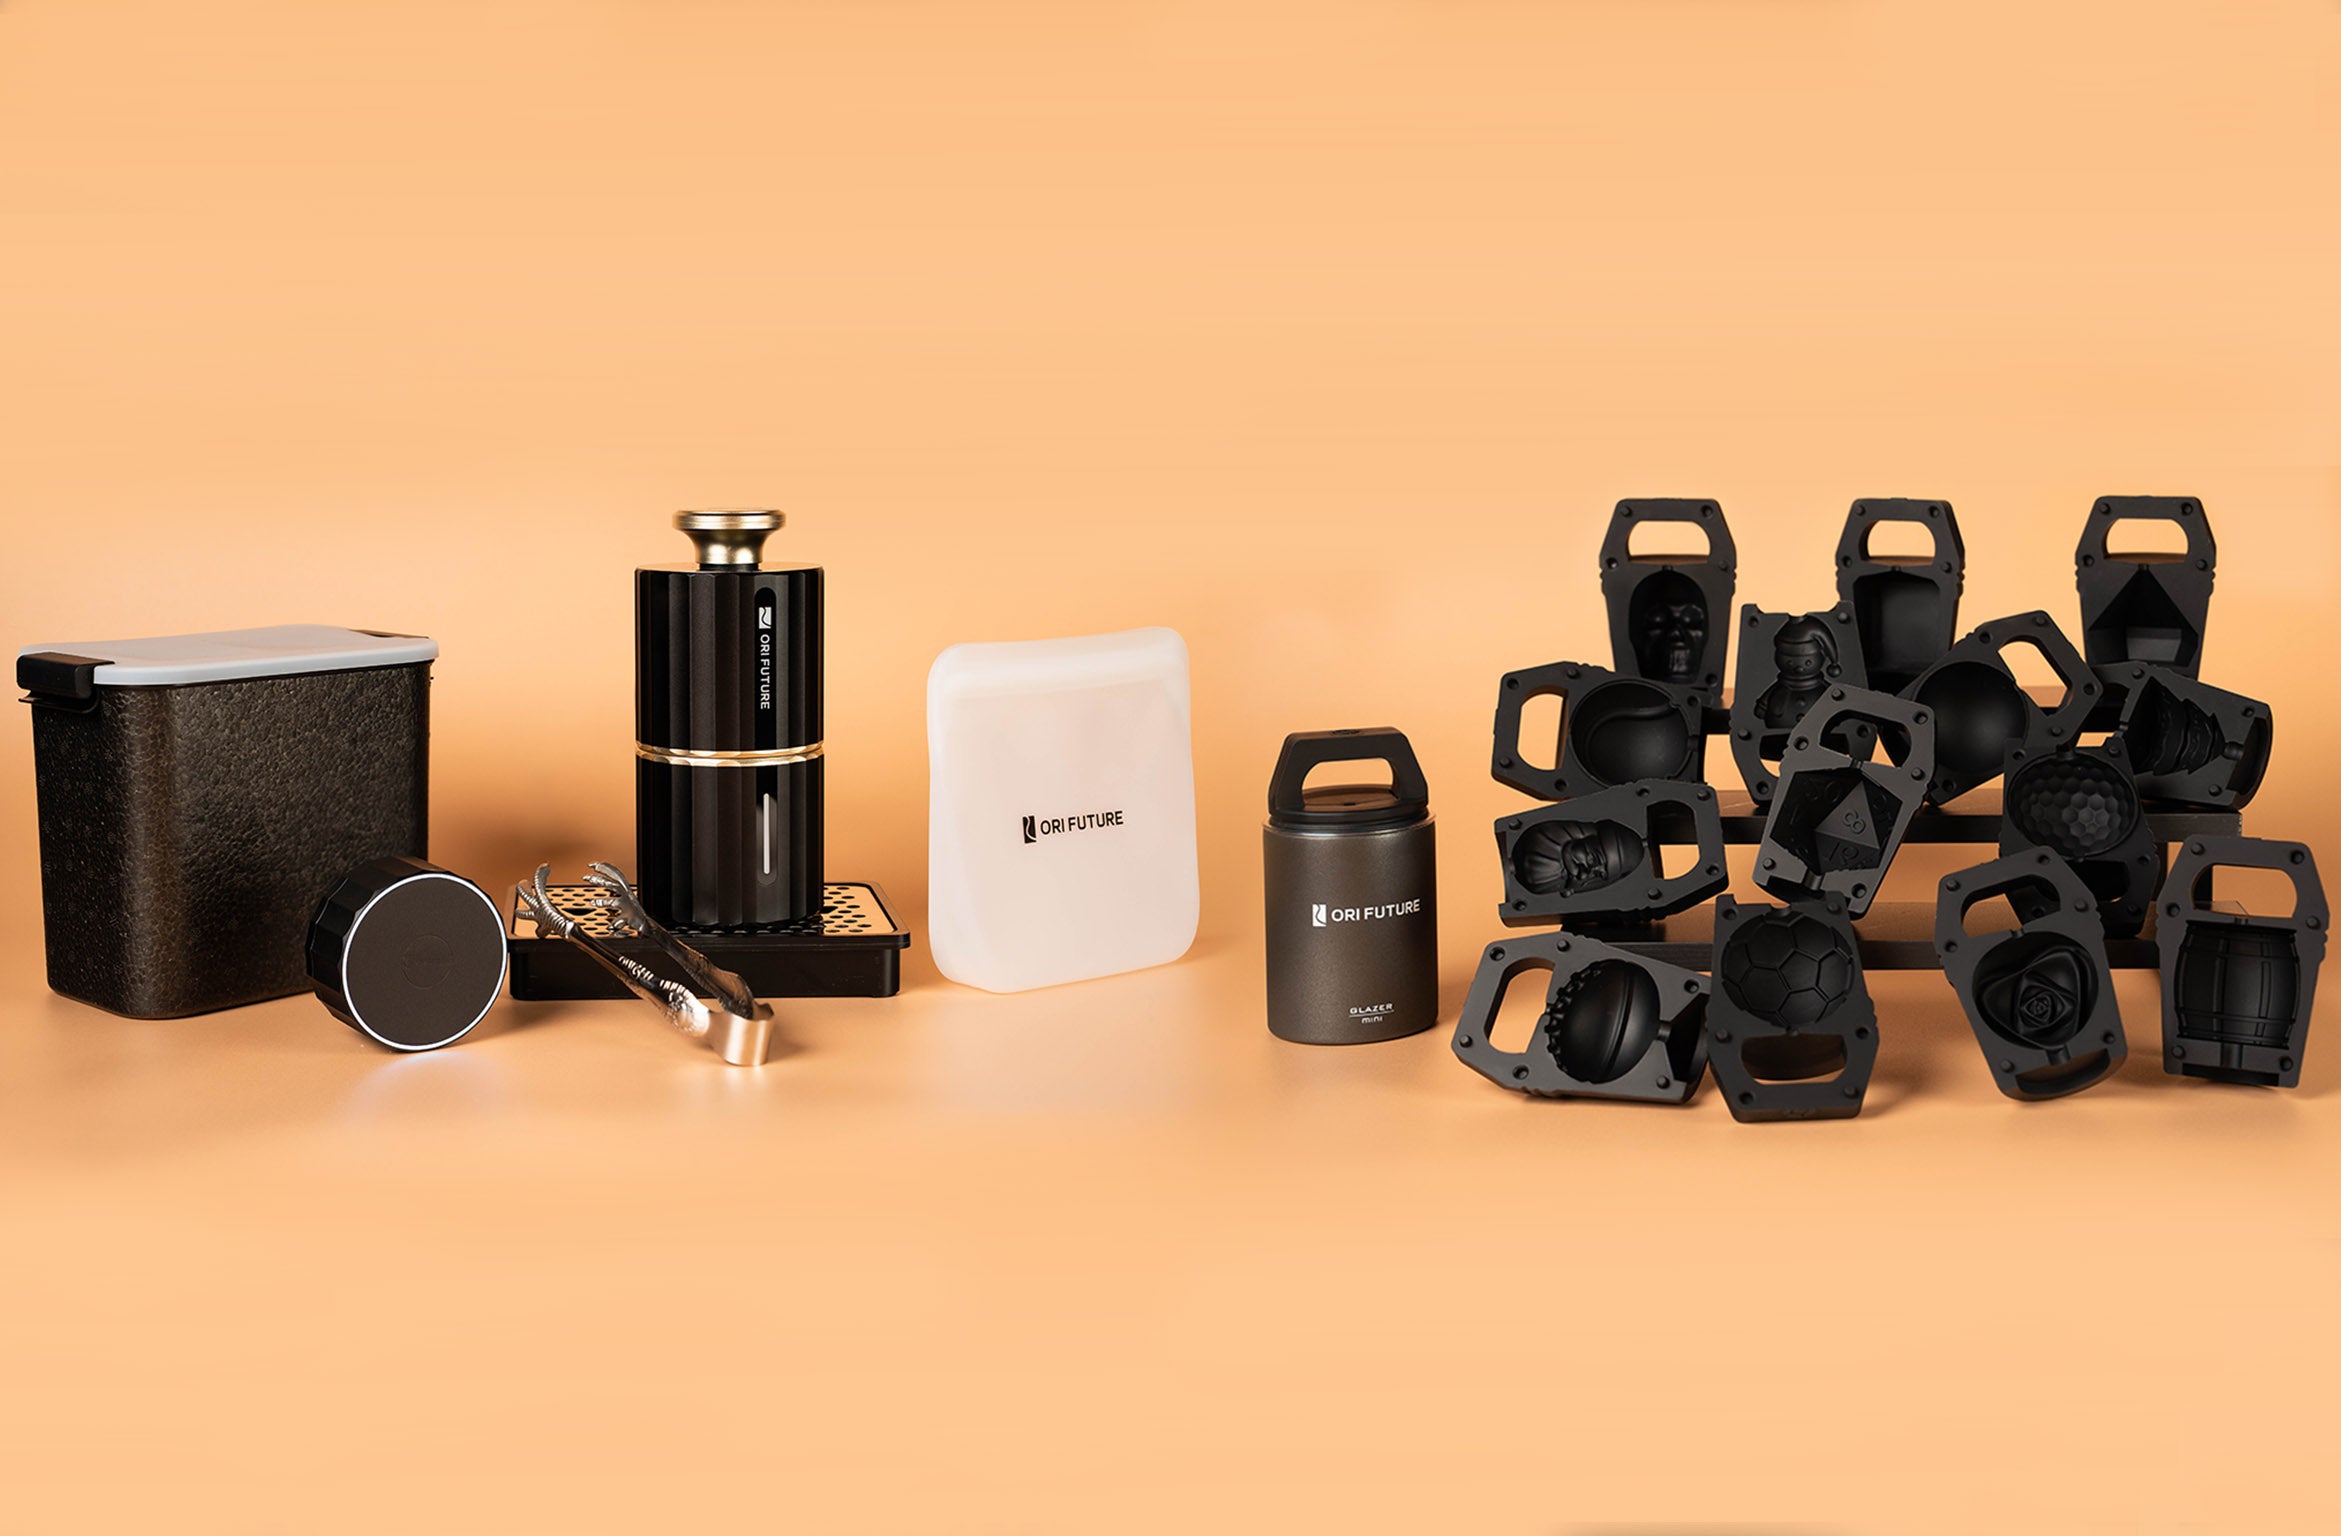
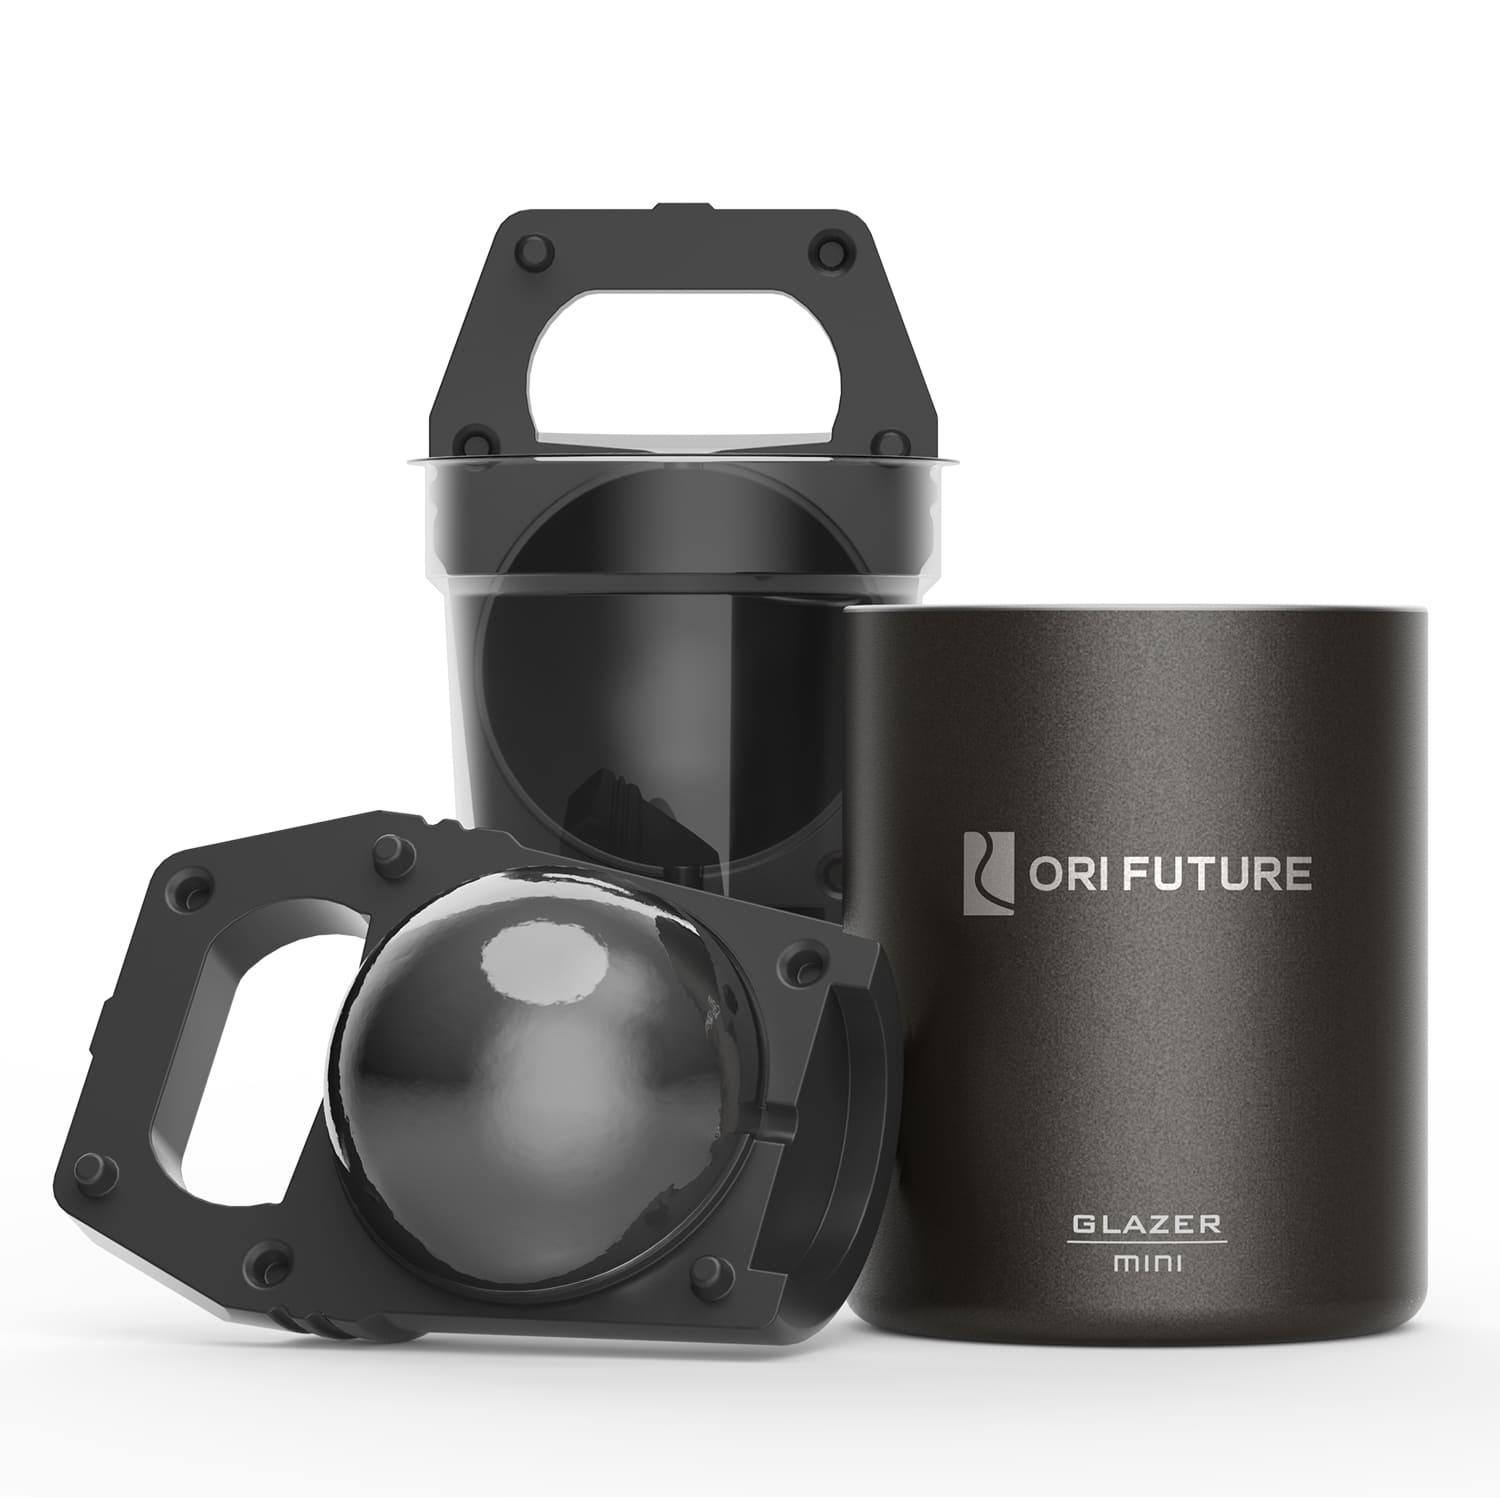
When you open your GLAZER mini, you notice right away how compact and sturdy it feels. ORI Future designed this ice maker to fit in any freezer, even if you have limited space. The food-grade stainless steel keeps your ice safe and pure, so you never have to worry about taste or safety. You also get a built-in release system that makes popping out your ice super easy. No more banging or twisting—just lift and enjoy.
Here’s a quick look at what makes the GLAZER mini special:
Unique Selling Point |
Description |
|---|---|
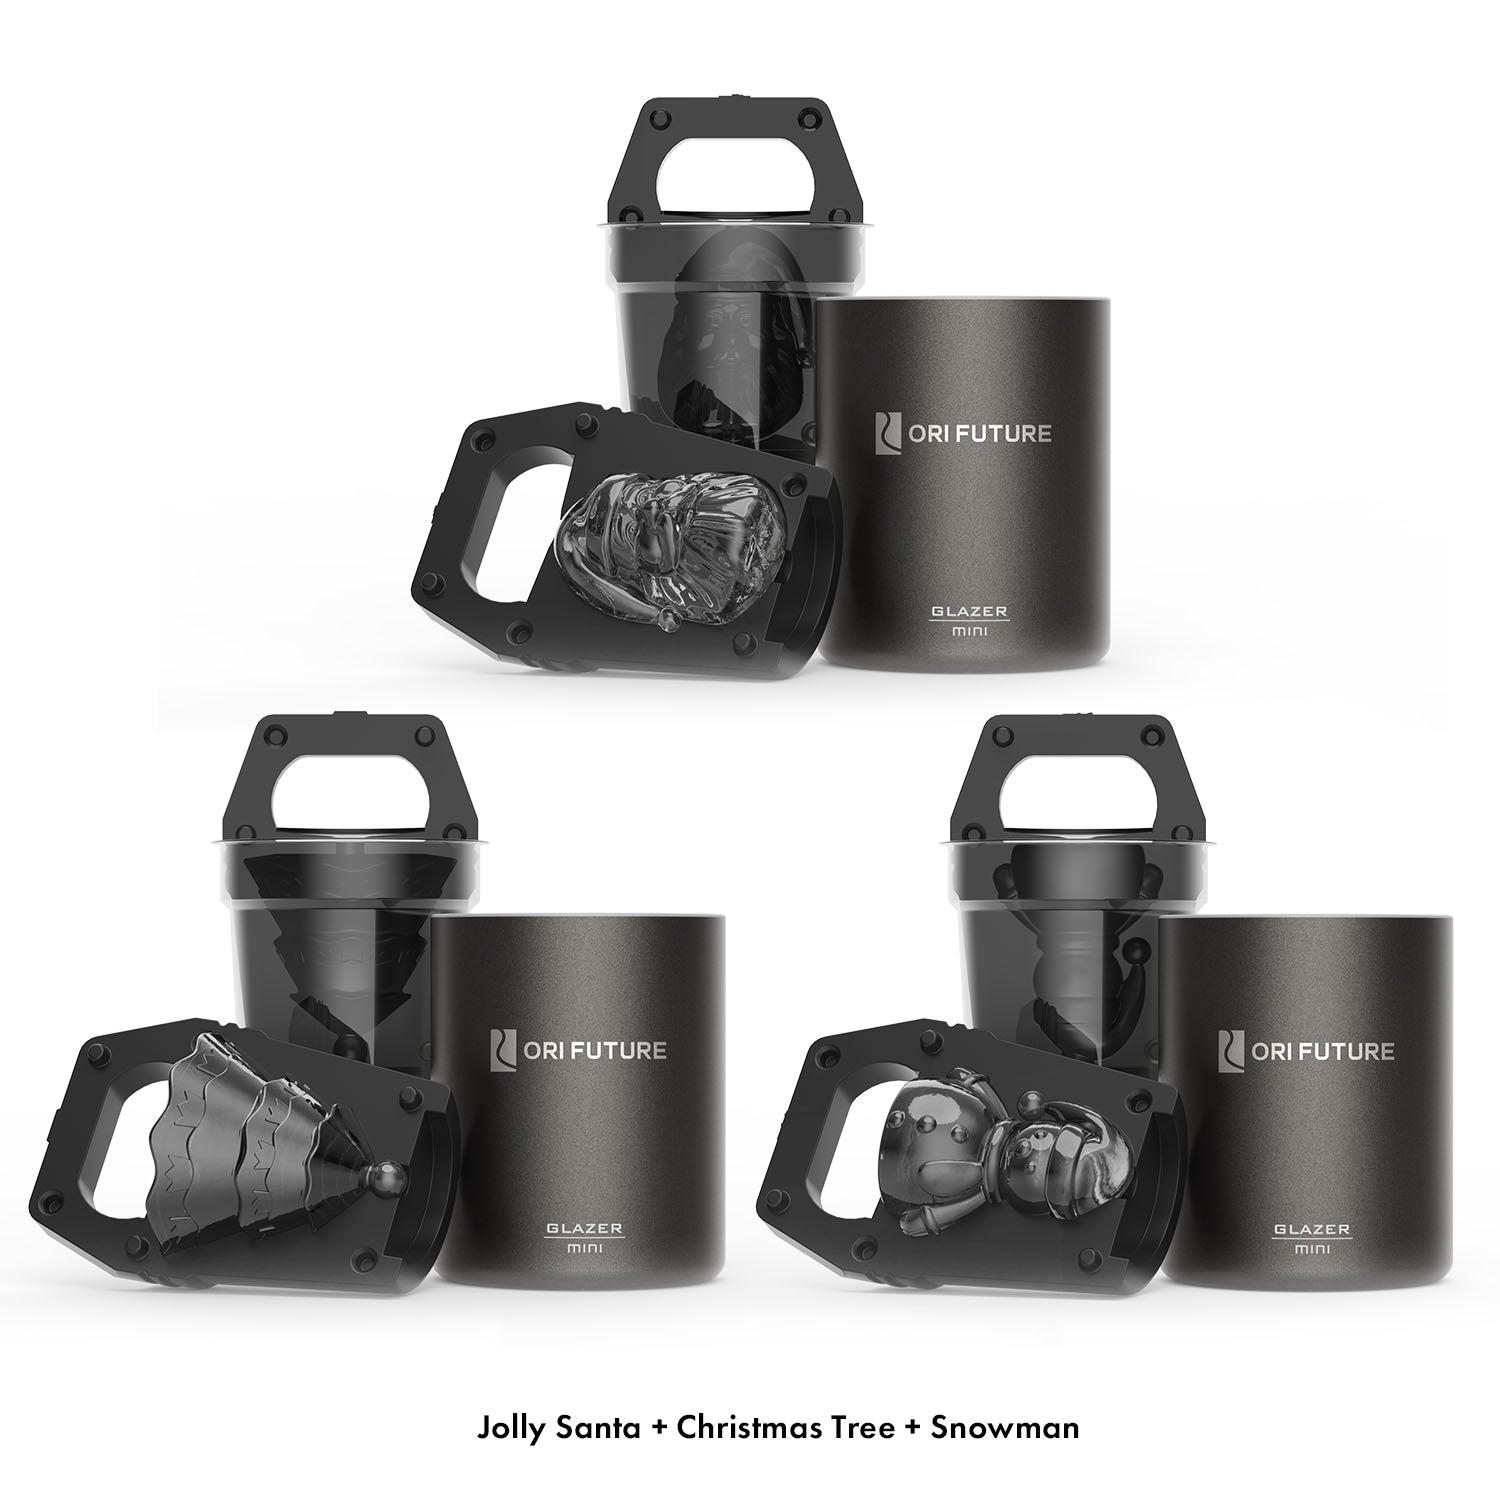
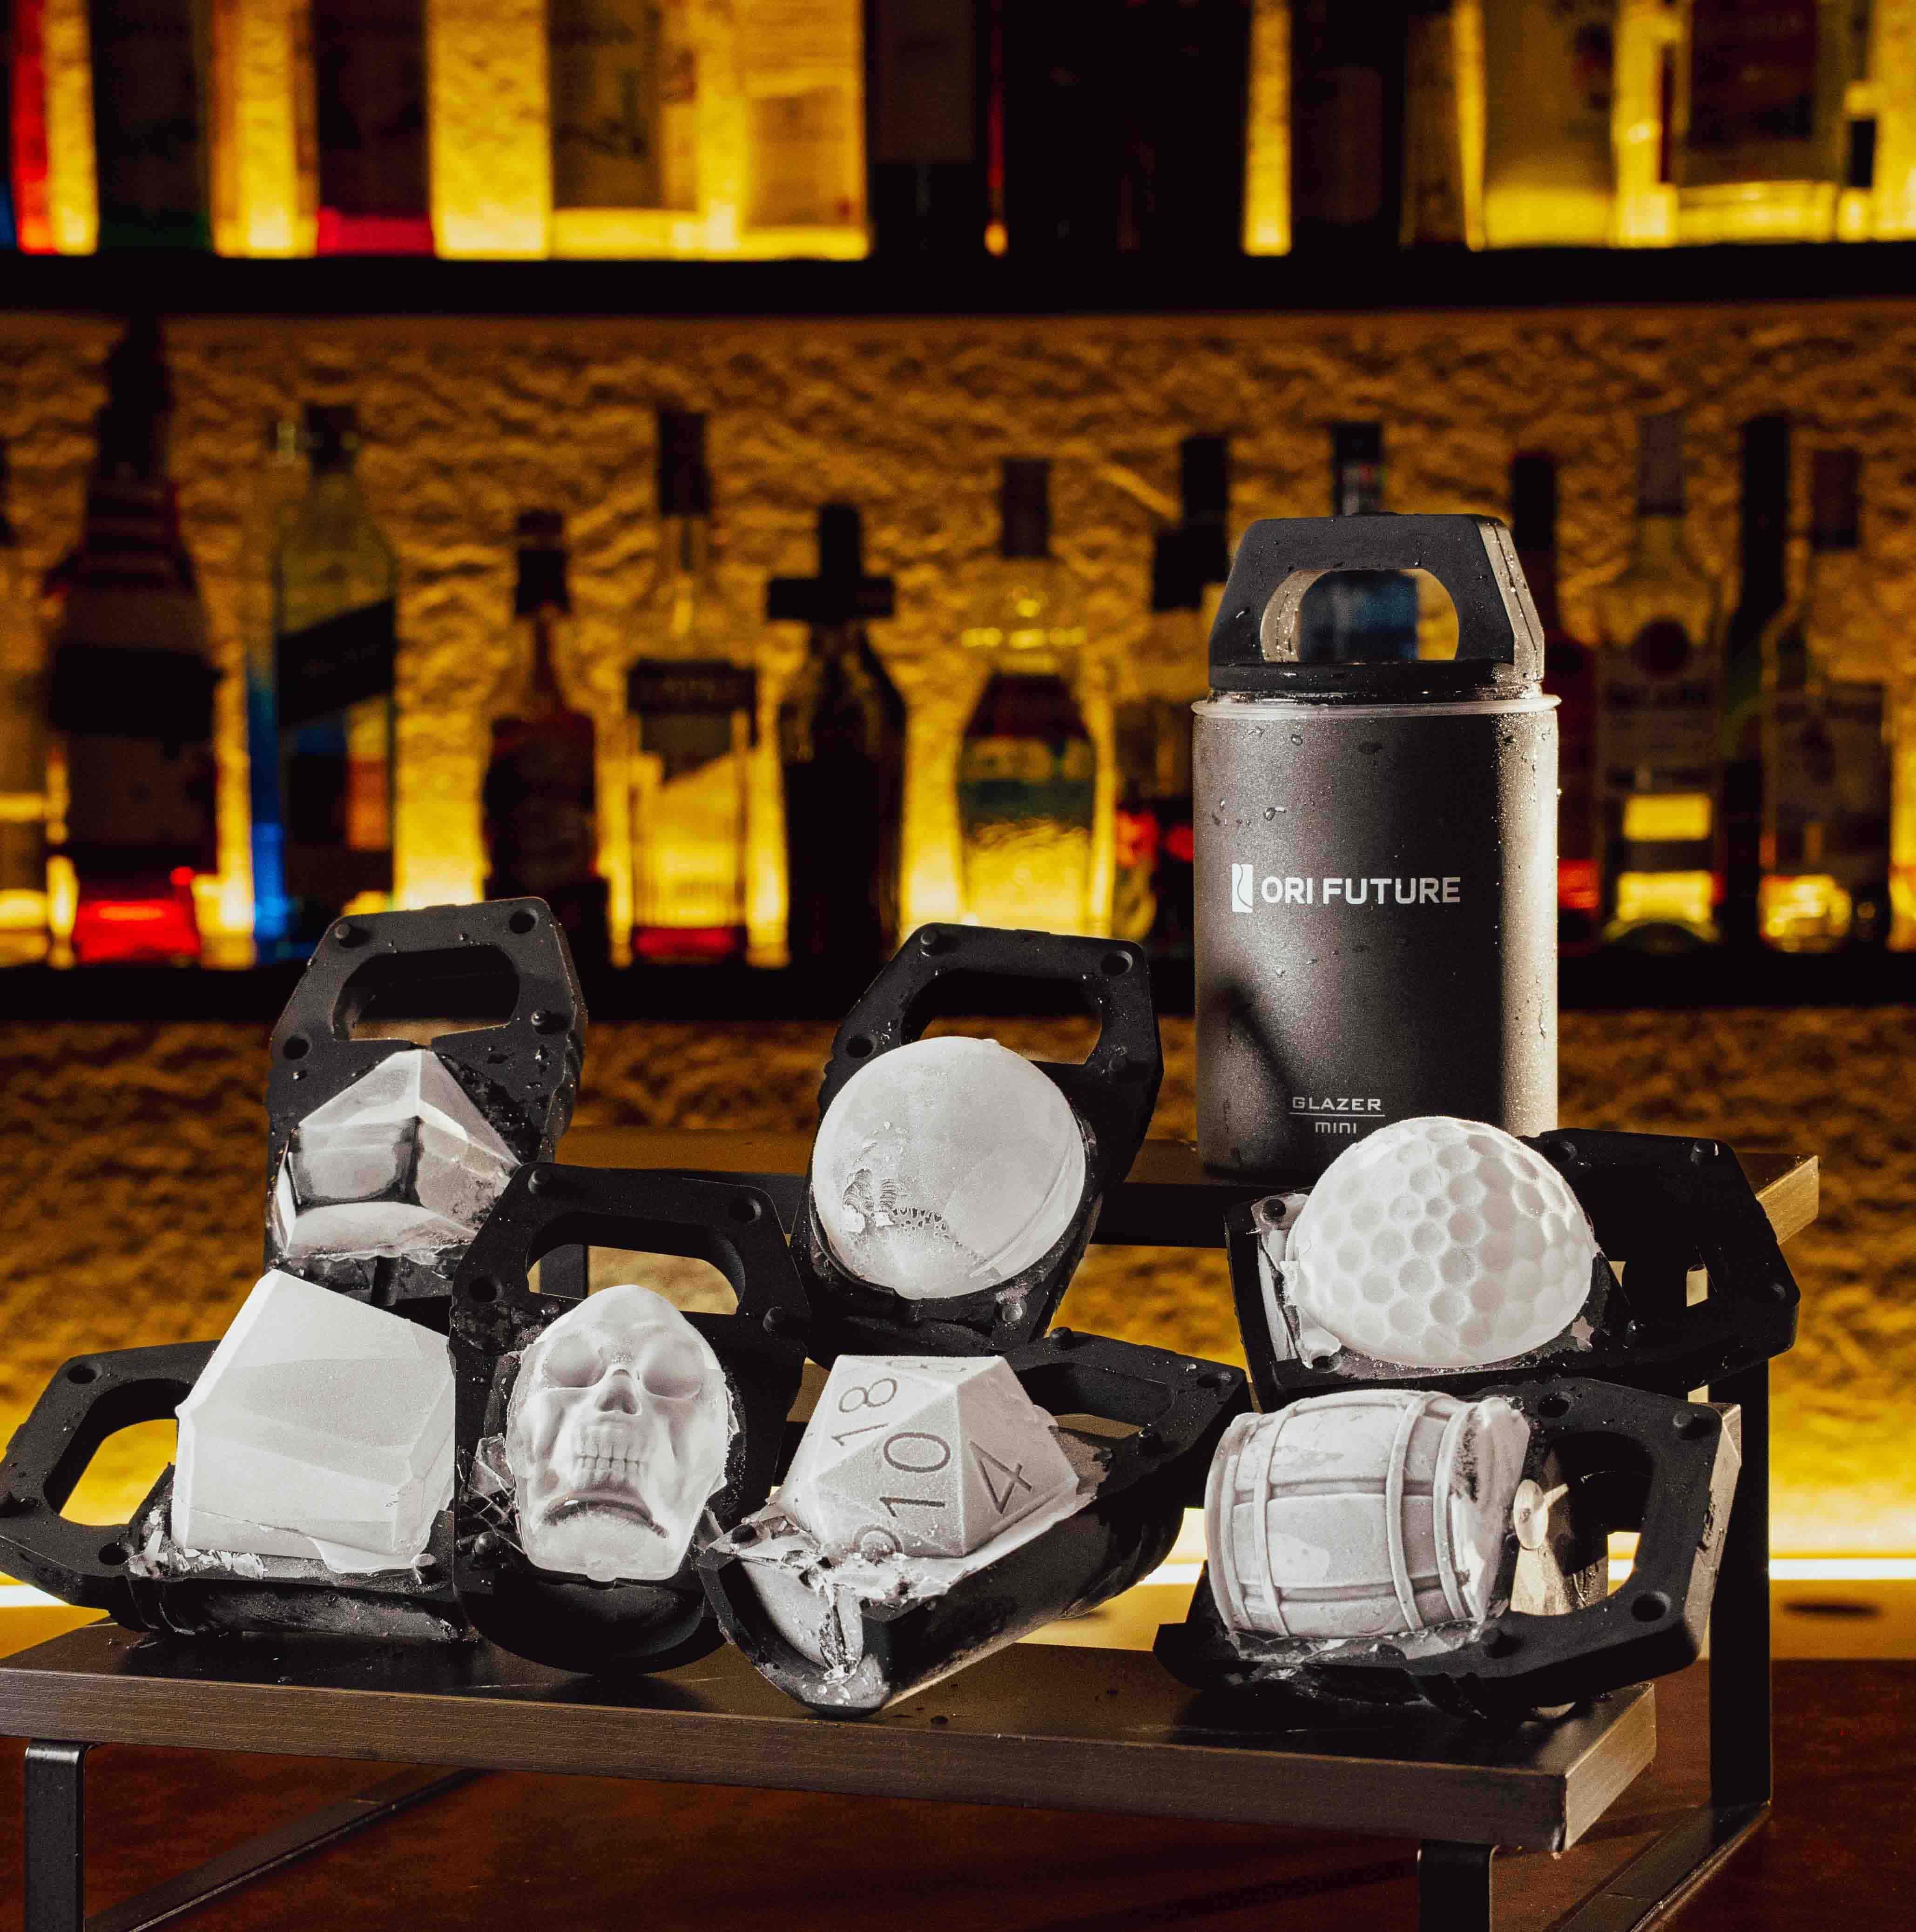
Six Unique Shapes |
Choose from sphere, cube, diamond, boat, D20, and skull for any occasion. |
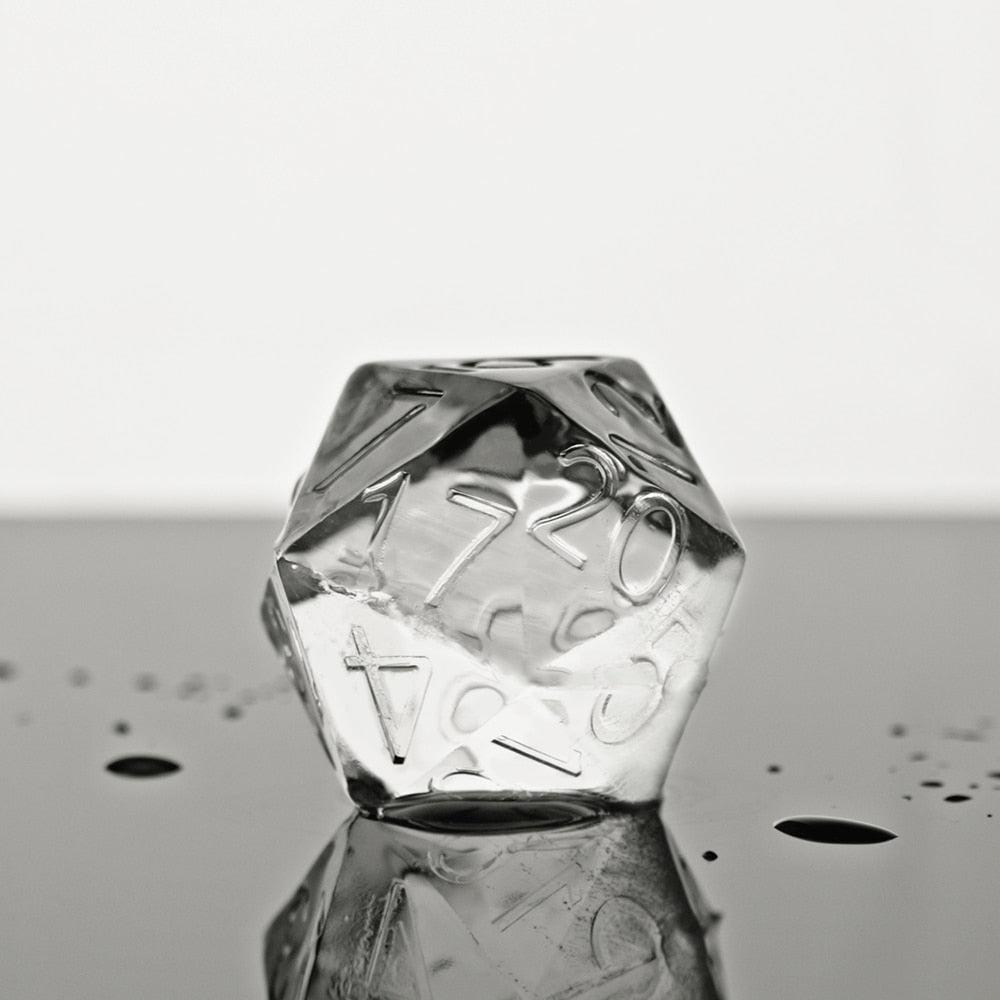
Crystal-Clear Results |
Directional freezing gives you professional-grade, clear ice every time. |
Space-Efficient Design |
Compact and durable, perfect for any kitchen or bar setup. |
Choosing Water
You want your ice to look as clear as glass. The secret? Use filtered or distilled water. Regular tap water has minerals and tiny particles that make ice cloudy. Distilled water is pure, so it freezes evenly and stays clear. When you use clean water, your ice looks better and melts slower, keeping your drinks cool without watering them down.
Pre-Chilling Tips
Before you pour water into your GLAZER mini, chill it in the fridge for a bit. Cold water freezes more evenly and helps stop bubbles from forming inside the ice. This simple step makes a big difference in how clear your ice turns out.
Pre-chilling water helps the freezing process stay smooth.
It keeps bubbles away, so your ice stays crystal clear.

Now you’re ready to make perfect ice every time!
Making Crystal Clear Ice
Filling the Mold
You want your ice to look flawless, so start with the right water. Grab chilled, filtered, or distilled water. Pour it slowly into the GLAZER mini mold. This helps keep air bubbles away and gives you that glass-like finish. Look for the fill line inside the mold. Stop pouring when you reach it. If you overfill, water can spill and mess up the shape.
Pour chilled, filtered, or distilled water into the mold.
Fill slowly to avoid trapping air bubbles.
Stop at the fill line.
Don’t overfill to prevent spillage.
Tip: Pouring slowly and using cold water makes your ice clearer and helps it freeze evenly.
Freezing Process
Now, place your filled mold in the freezer. Pick the coldest spot you can find. Directional freezing starts working right away. This process pushes air and impurities out, so your ice turns out crystal clear. Let the mold sit for 18 to 24 hours. You get the best results when you give it enough time.
Here’s a step-by-step guide to freezing:
Assemble and set up your GLAZER mini. Make sure everything is clean and dry.
Place the mold on a flat surface in your freezer.
Attach the plastic release cup.
Freeze for 18 to 24 hours.
Note: The GLAZER mini uses advanced technology to freeze ice faster than standard trays. You can refreeze ice in about 30 to 60 seconds if you use the ice ball press feature. Standard trays take several hours.
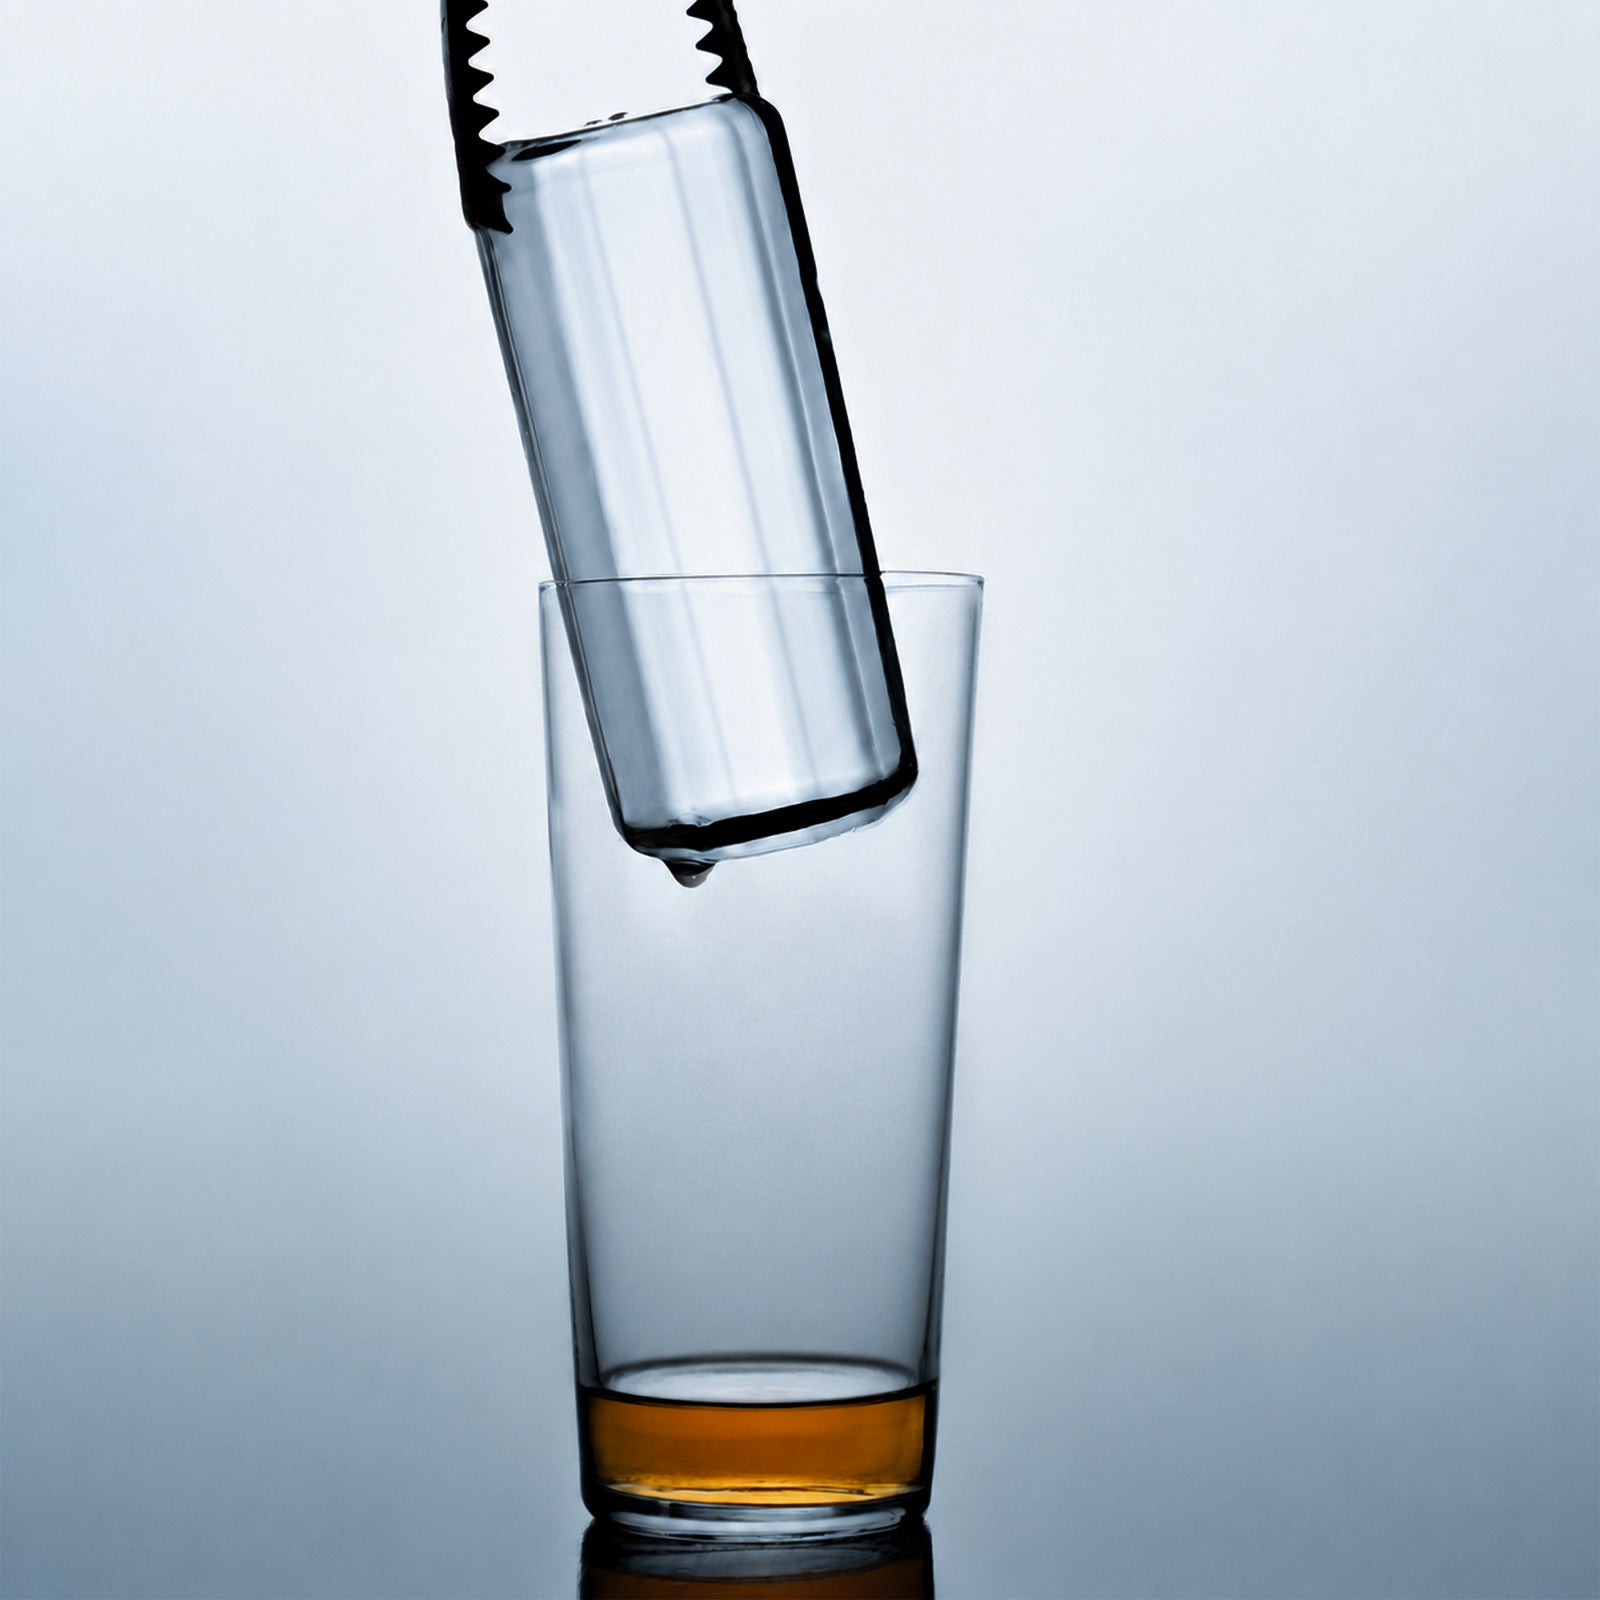
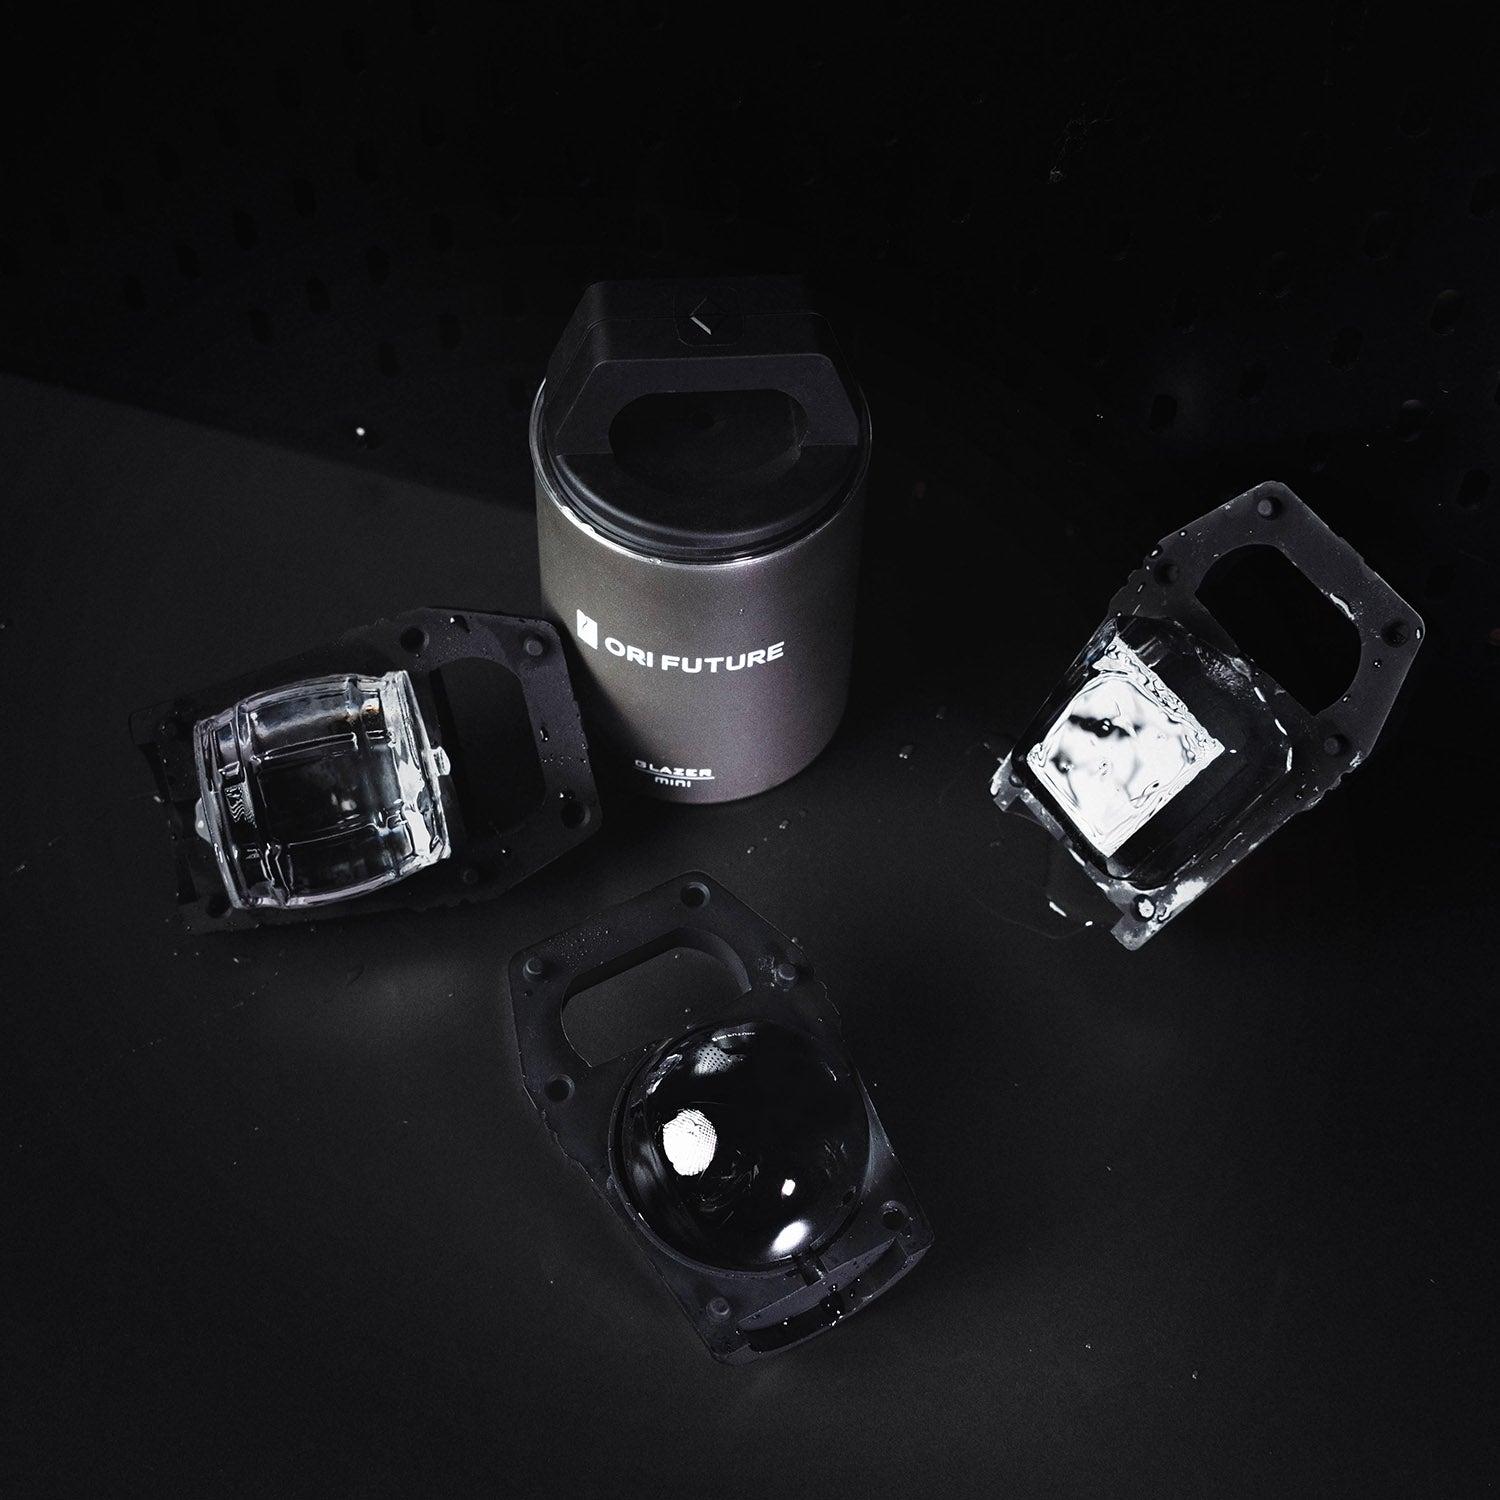
Easy Ice Release
When your ice is ready, you don’t have to fight with the mold. The GLAZER mini makes releasing ice simple and quick. Lift the plastic release cup. The ice pops out clean and whole. You don’t need to tap or soak the mold.
The GLAZER mini uses smart design to help you:
Mechanism |
How It Helps You Get Ice Easily |
|---|---|
Thermal Energy |
Melts ice quickly without steam. |
Mechanical Pressure |
Ensures ice fills the mold and releases easily. |
Anti-stick Layer |
Stops ice from sticking to the mold. |
Food-grade stainless steel conducts heat well.
Anti-stick layer keeps ice from getting stuck.
Pro Tip: Always make sure your mold is clean and dry before you start. This keeps your ice clear and makes release even easier.
Now you can enjoy crystal-clear ice in cool shapes, ready for your next drink or celebration!
Pro Tips for Perfect Results

Avoiding Air Bubbles
You want your ice to look flawless, not cloudy. The GLAZER mini uses directional freezing to push air and impurities away as the water freezes. This method gives you that crystal-clear look every time. To avoid bubbles, try these steps:
Pour water gently into the mold. This keeps air from getting trapped.
Use distilled or boiled water. Boiling removes extra air and impurities.
Let the water cool before pouring it in.
Lower your freezer’s temperature. Slow freezing helps bubbles escape.
Tip: Boil your water once or twice, then let it cool. This simple trick makes a big difference in clarity.
Cleaning and Maintenance
A clean GLAZER mini means perfect ice every time. Rinse the mold right after you use it. This stops residue from building up. For a deeper clean, use mild soap and warm water. Let the mold air dry before you use it again. You can also wipe the plate with a soft, damp cloth. Once a month, clean with a vinegar solution (one part vinegar to four parts water) to remove any calcium spots.
Store your mold in a clean, dry place or keep it in the freezer.
Don’t stack heavy items on top. This keeps the mold in shape.
Storing Clear Ice
You want your ice to stay clear and taste fresh. Use good water for the best results. Bottled spring water works well. If you use tap water, boil it first. Store your ice at the top of the freezer. This spot stays cold and helps keep your ice from picking up odors.
Note: Directional freezing and proper storage keep your ice looking and tasting great for every drink.
Troubleshooting Common Issues
Cloudy Ice Fixes
Cloudy ice can happen, but you can fix it with a few easy steps. You want your ice to look clear and beautiful every time. Try these tips:
Use filtered or distilled water. This helps remove minerals and tiny particles that make ice cloudy.
Master the directional freezing method. The GLAZER mini uses this technique to push air and impurities out as the ice freezes.
Choose high-performance molds like the GLAZER mini. These molds freeze water in a way that makes your ice look crystal clear.
Tip: If you still see cloudy spots, try boiling your water first and letting it cool before pouring it into the mold.
Preventing Sticking
No one likes ice that sticks to the mold. The GLAZER mini makes release easy, but you can do a few things to help even more:
Always start with a clean, dry mold.
Fill the mold slowly with chilled water. This keeps air bubbles away and helps the ice form smoothly.
Let the ice freeze for the full 18 to 24 hours. This gives it time to set and makes release easier.
If you ever have trouble, just let the mold sit at room temperature for a minute. The ice should pop right out.
Improving Results
You want the best ice possible. Here are some extra tips to make your ice perfect every time:
Use high-quality, filtered water for better taste and clarity.
Pre-chill your water before pouring it in.
Clean your GLAZER mini often to keep it free from slime or scale.
Set your freezer to the coldest setting.
Fill the mold slowly to avoid trapping air bubbles.
Note: Small changes in your routine can make a big difference. Try these steps and watch your ice go from good to amazing!
Gifting GLAZER mini: One Year Anniversary Gifts for Him
Why It’s a Memorable Gift
You want to give a gift that stands out. The GLAZER mini makes a great choice for one year anniversary gifts for him. It looks stylish and feels special. When you give this ice mold, you show that you care about quality and fun. The GLAZER mini is easy to use, so anyone can make perfect ice at home. Its durable design means he will enjoy it for years.
Here are some reasons why it’s a memorable gift:
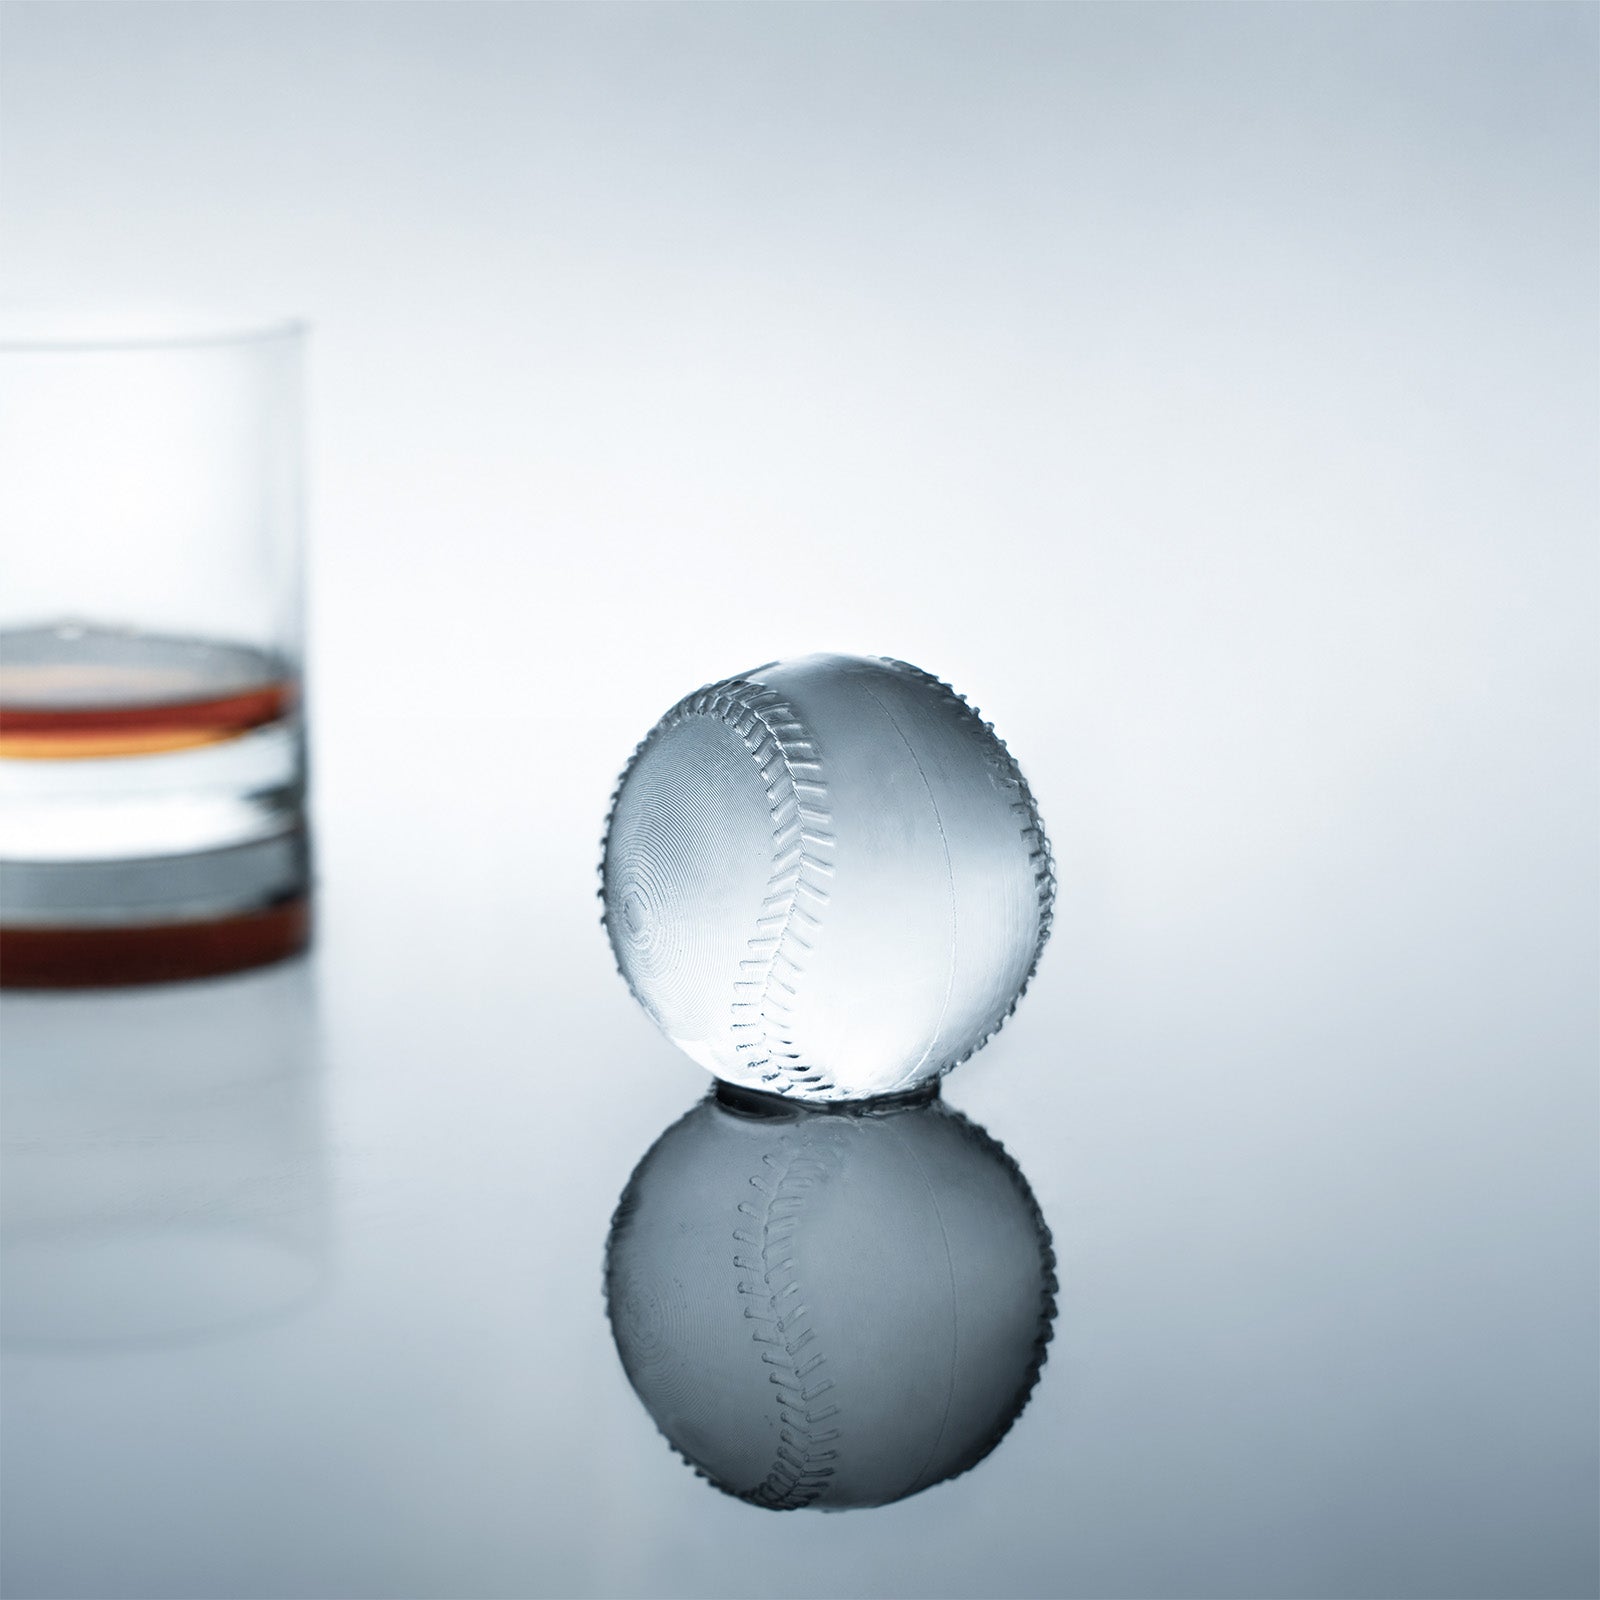
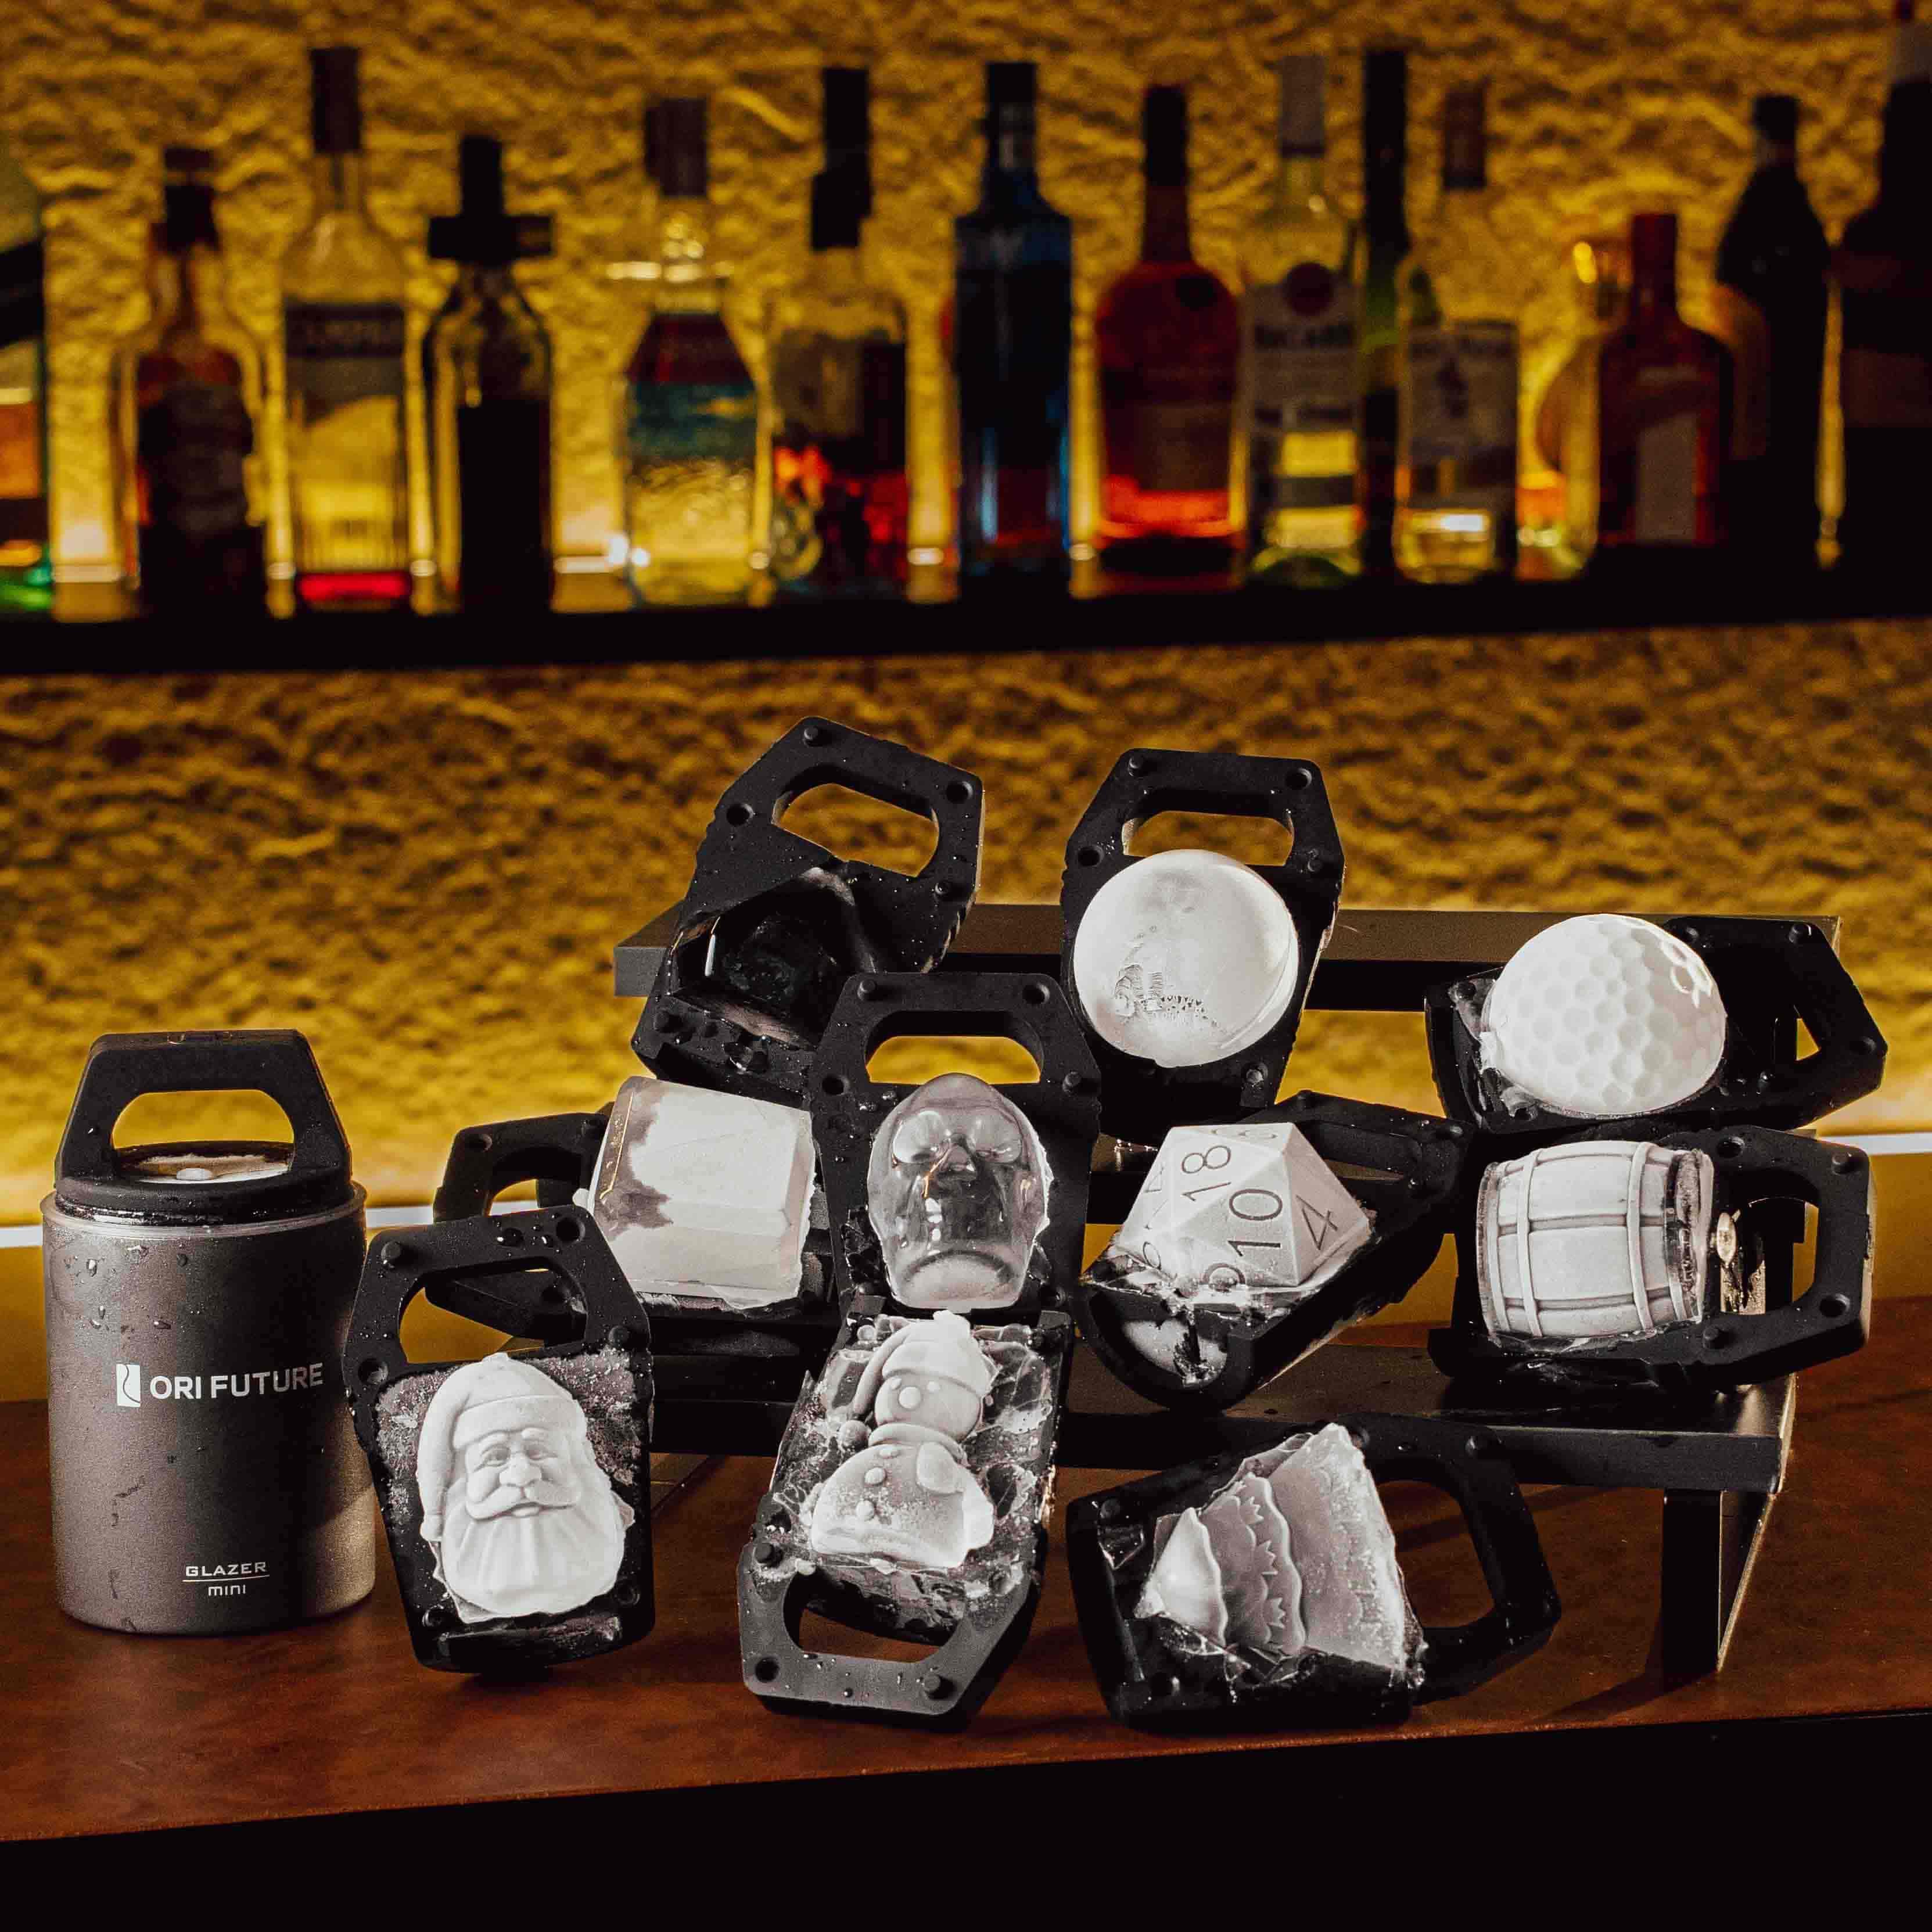
Unique ice shapes like spheres and diamonds make every drink look amazing.
Clear ice keeps whiskey tasting smooth and pure.
The GLAZER mini is user-friendly, so he can use it right away.
Fun shapes add excitement to any celebration or gathering.
The sturdy build means it lasts, making memories for many anniversaries.
If you want one year anniversary gifts for him that he will remember, this is a smart pick.
Impressing with Unique Ice Shapes
You can make any drink feel special with the GLAZER mini. This ice mold offers over ten different shapes. Classic spheres and cubes work well for whiskey. Fun shapes like skulls or D20 dice bring a playful touch to parties. When you use clear ice, your cocktails look and taste better. The ice melts slowly, so drinks stay cold without getting watered down.
Take a look at what you can create:
Shape |
Best For |
Occasion |
|---|---|---|
Sphere |
Whiskey, cocktails |
Date nights |
Diamond |
Whiskey, parties |
Anniversaries |
Skull |
Themed parties |
Halloween, fun |
D20 Dice |
Game nights |
Celebrations |
You want one year anniversary gifts for him that feel personal. The GLAZER mini lets you pick shapes that match his style. Every time he makes a drink, he will remember your thoughtful gift.
You can get crystal-clear ice every time with these steps:
Press the lining and seal the mold flat.
Add water slowly, stopping before the top.
Freeze the mold undisturbed.
With GLAZER mini, you enjoy easy use, quick release, and fun shapes. Try it yourself or give it as a thoughtful gift!
FAQ
How do I clean my GLAZER mini?
Just rinse with warm water and mild soap. Let it air dry. For tough spots, use a vinegar solution.
Tip: Clean after every use for best results.
Can I use tap water in the GLAZER mini?
You can use tap water, but filtered or distilled water gives you clearer ice.
Tap water may make ice look cloudy.
How long does it take to make clear ice?
You usually need 18 to 24 hours.
For best results, freeze overnight and check the next day.
