


How to Fill Ice Ball Mold with Water – A Step-by-Step Guide Using GLAZER Press
Table of Contents Fill Ice Ball Mold with Water
- Introduction
- Why Use Ice Ball Molds?
- What is the GLAZER Ice Press?
- Step 1: Preparing Your Water
- Step 2: How to Properly Fill the Ice Ball Mold
- Step 3: Freezing the Mold
- Step 4: Using the GLAZER Press to Shape the Ice
- Pro Tips for Crystal-Clear Ice Balls
- Why Choose GLAZER Press?
- Summary Table
- References
Introduction Fill Ice Ball Mold with Water
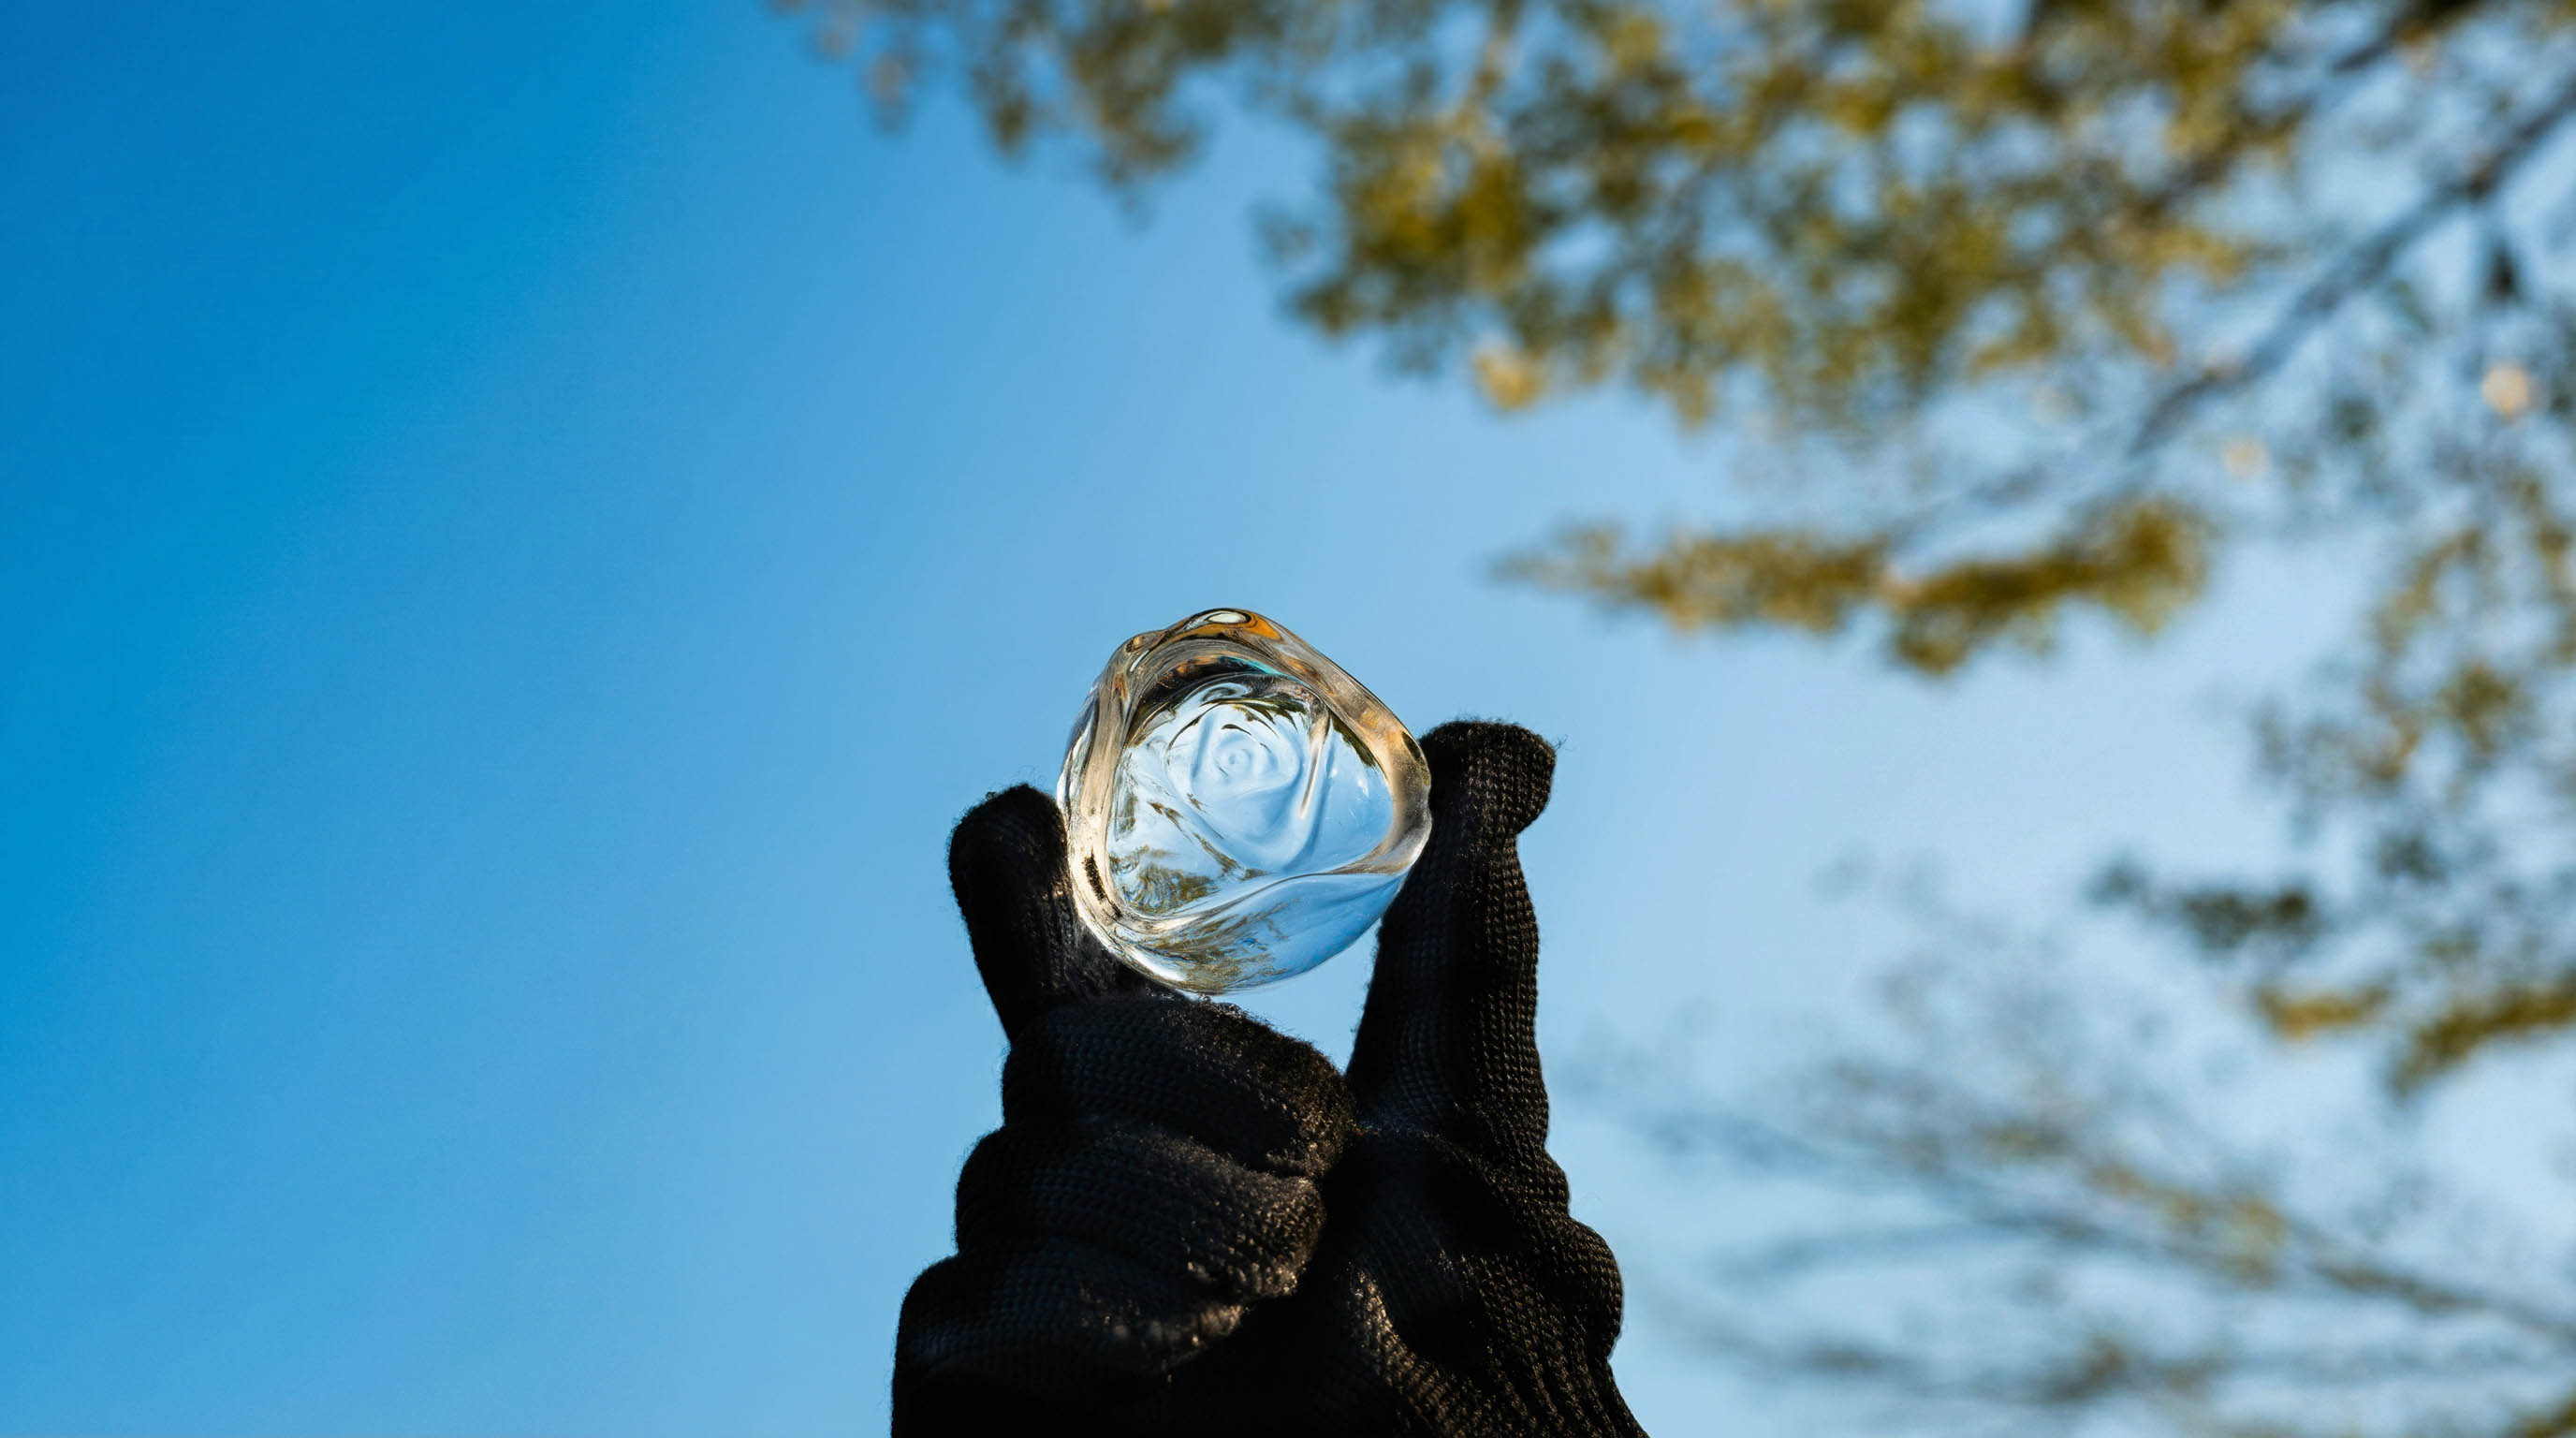
Making the perfect ice ball for your cocktails or whiskey requires more than just a standard ice cube tray. Learning how to properly fill an ice ball mold is the first step in achieving bar-quality aesthetics and flavor preservation. When combined with an innovative device like the GLAZER Press, you can create stunning and intricate ice shapes at home that elevate your drinking experience.

Why Use Ice Ball Molds?
Ice balls melt more slowly than traditional cubes, keeping your drinks cold without diluting them too fast. Additionally, they add a level of elegance and sophistication to beverages. Here's why they're increasingly popular:
- Slower dilution: maintains flavor longer
- Better aesthetics: impressive presentation in cocktails or whiskey
- Efficient cooling: covers more volume than standard cubes
What is the GLAZER Ice Press?

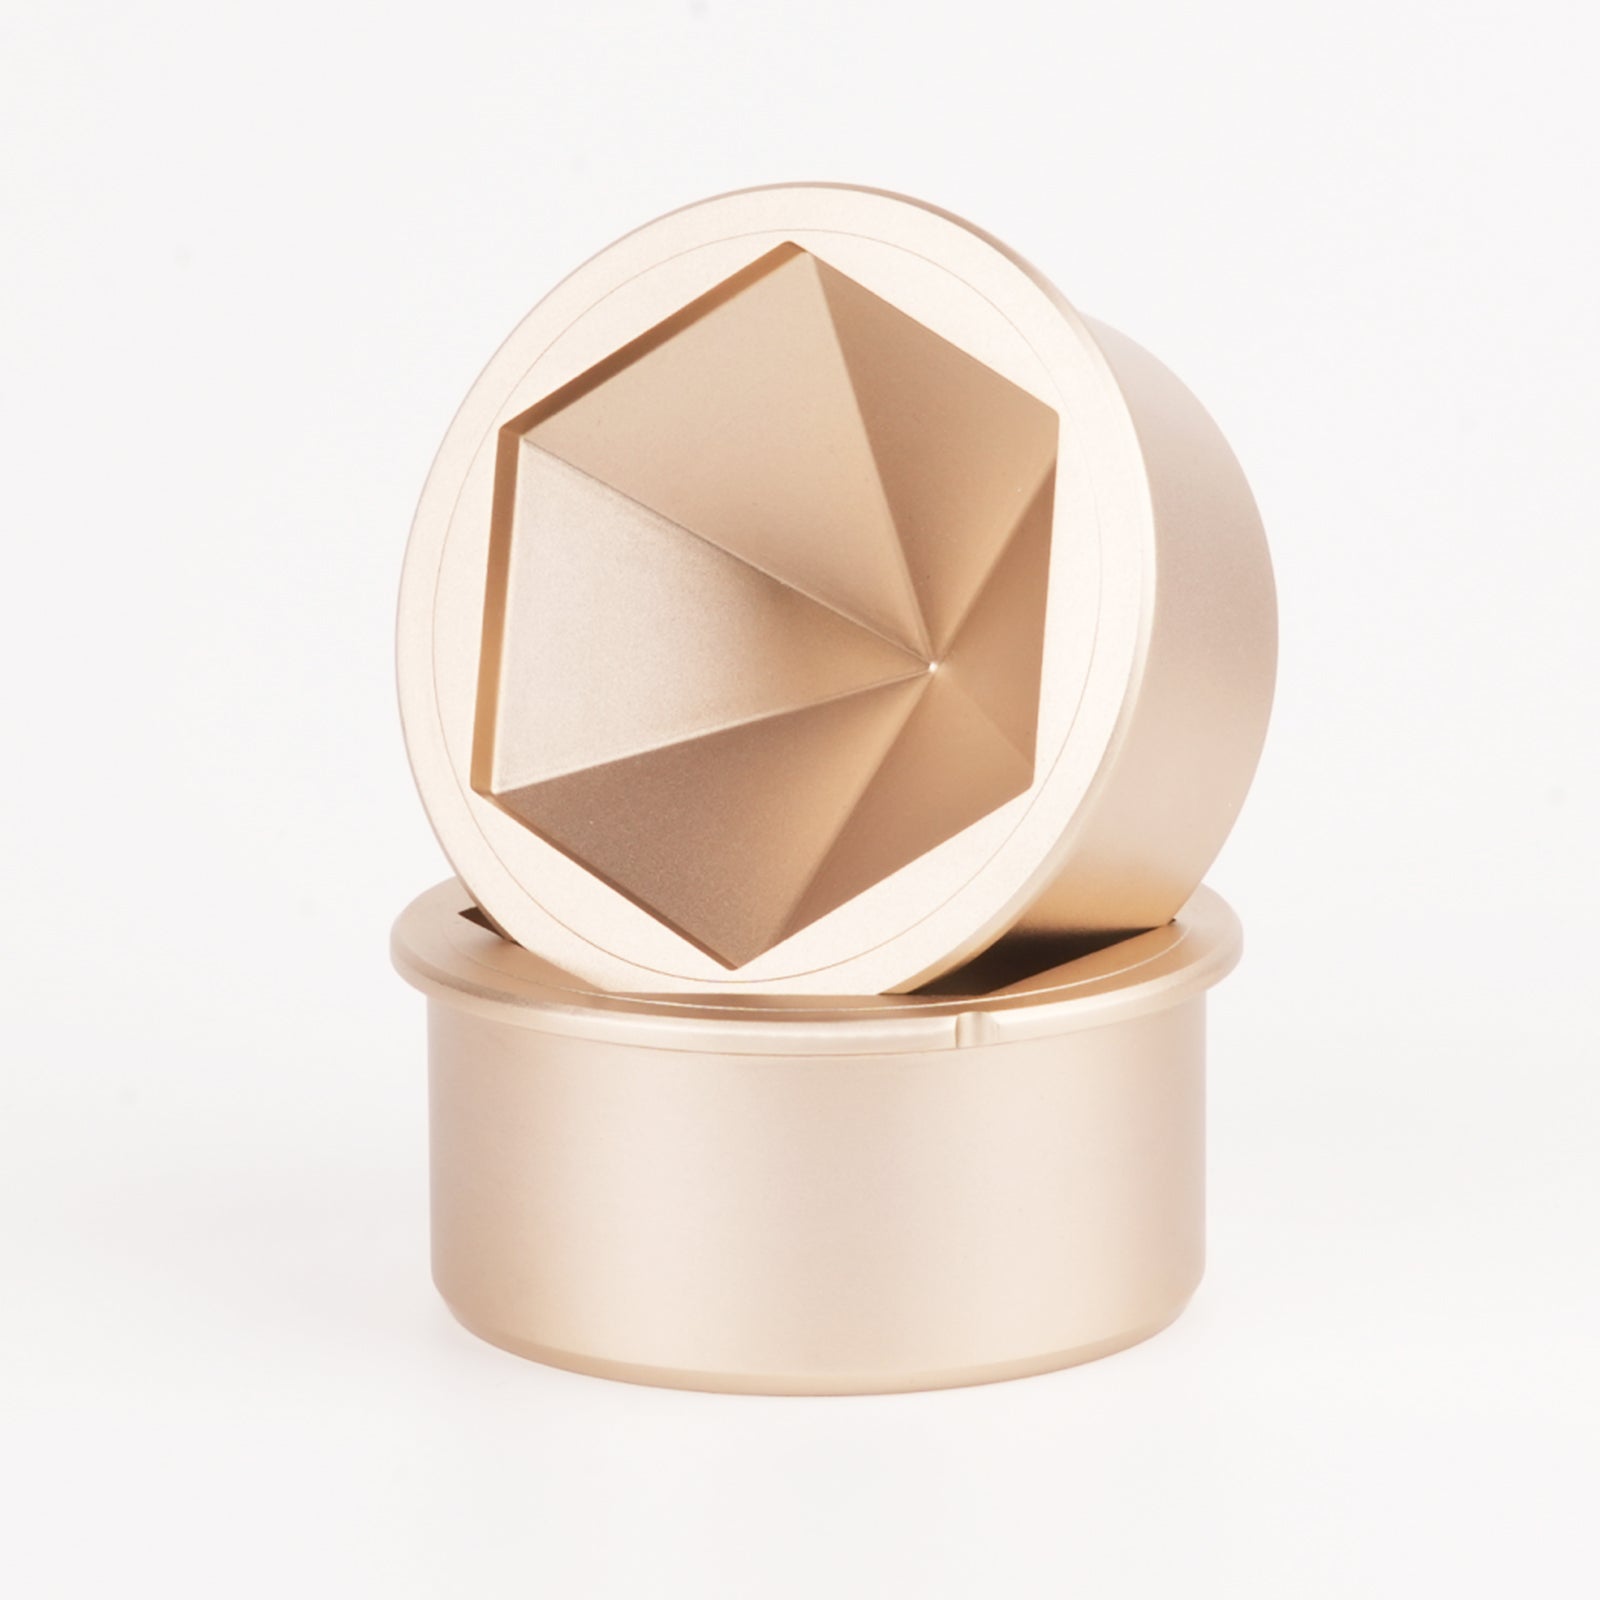
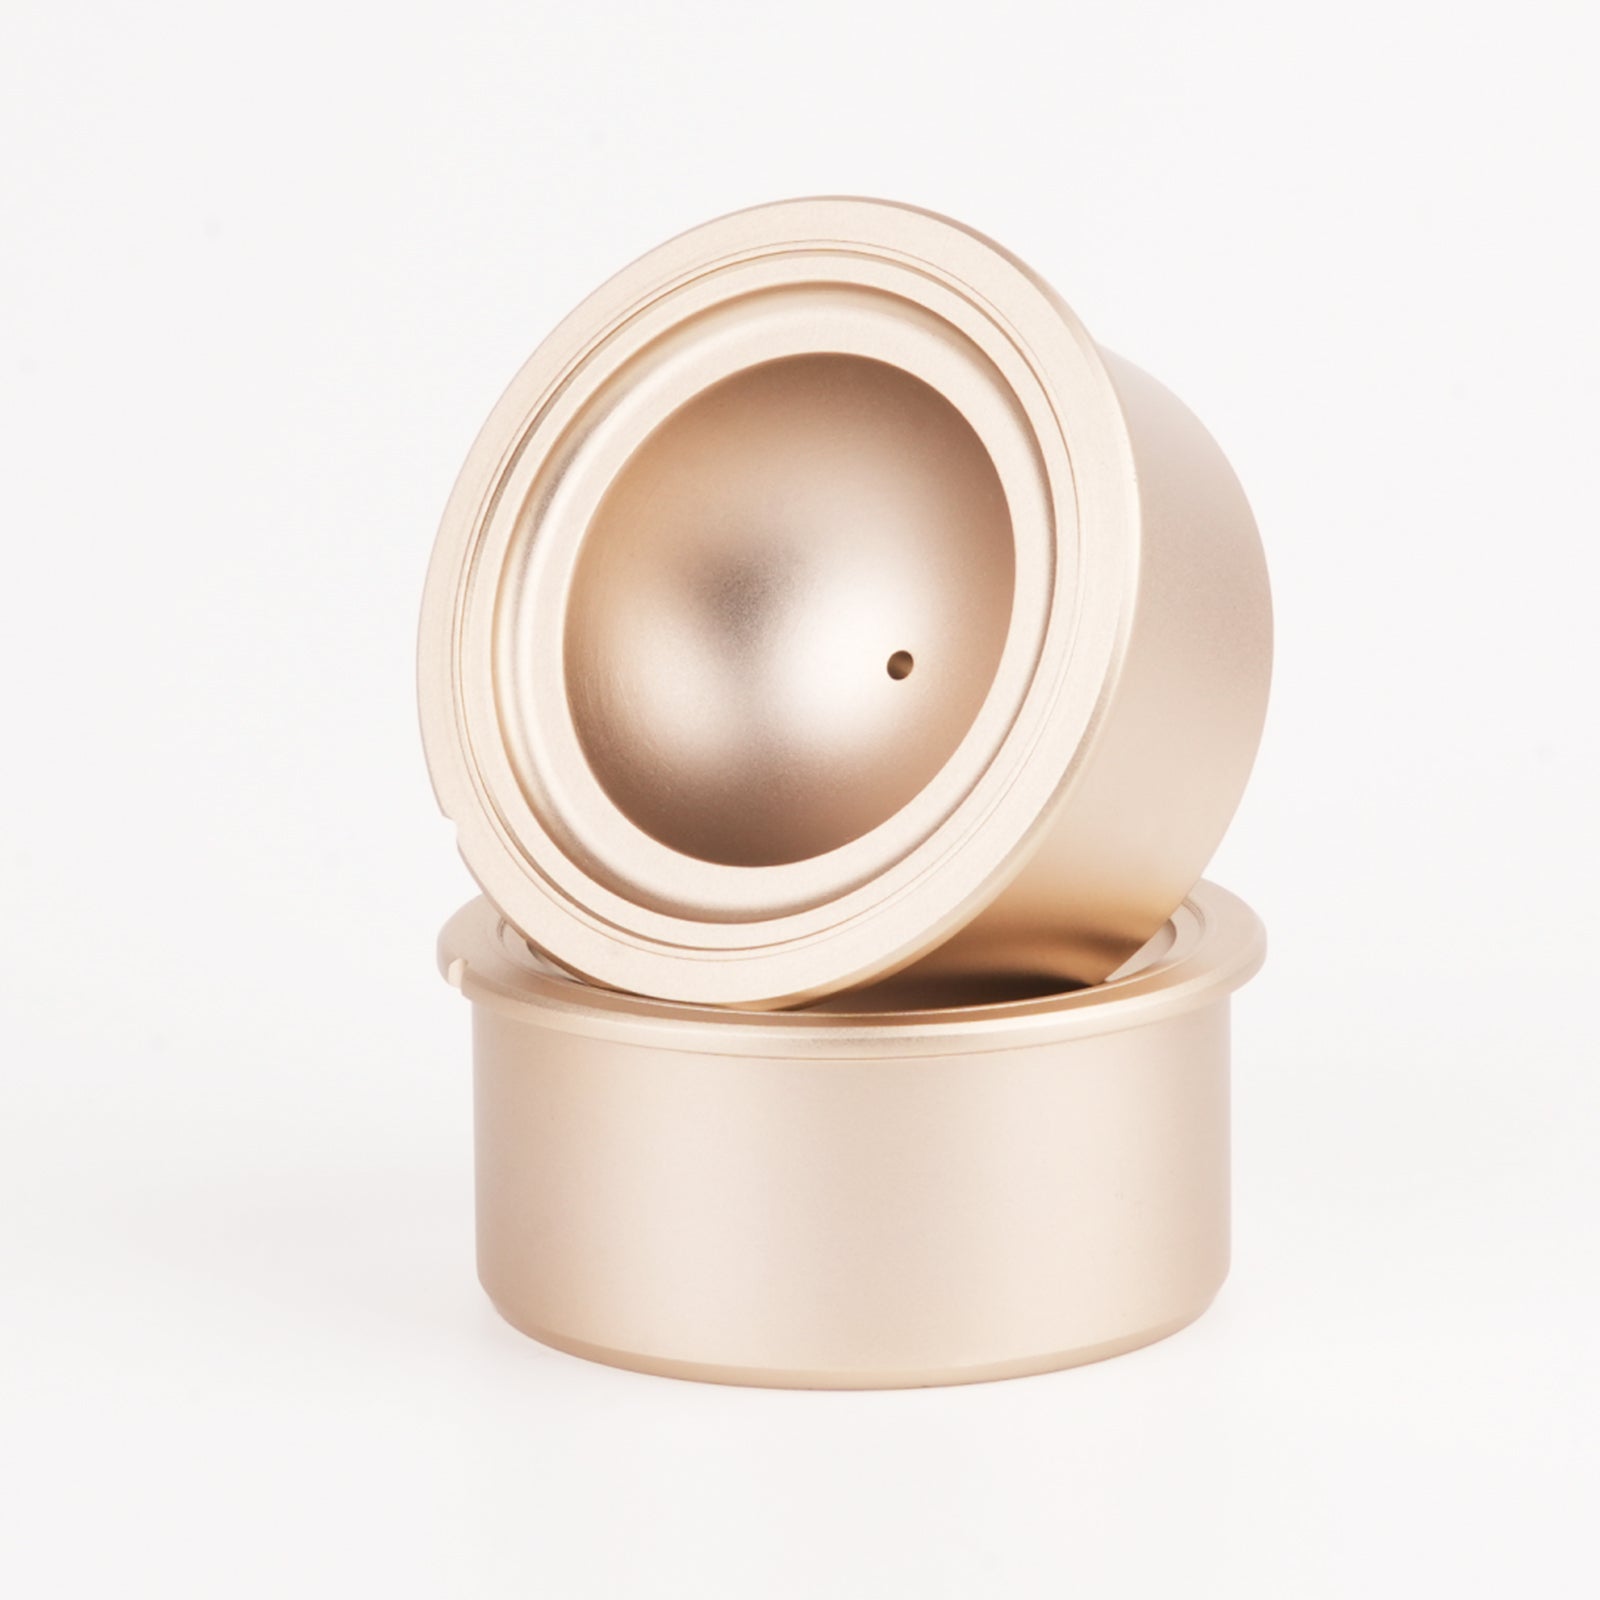
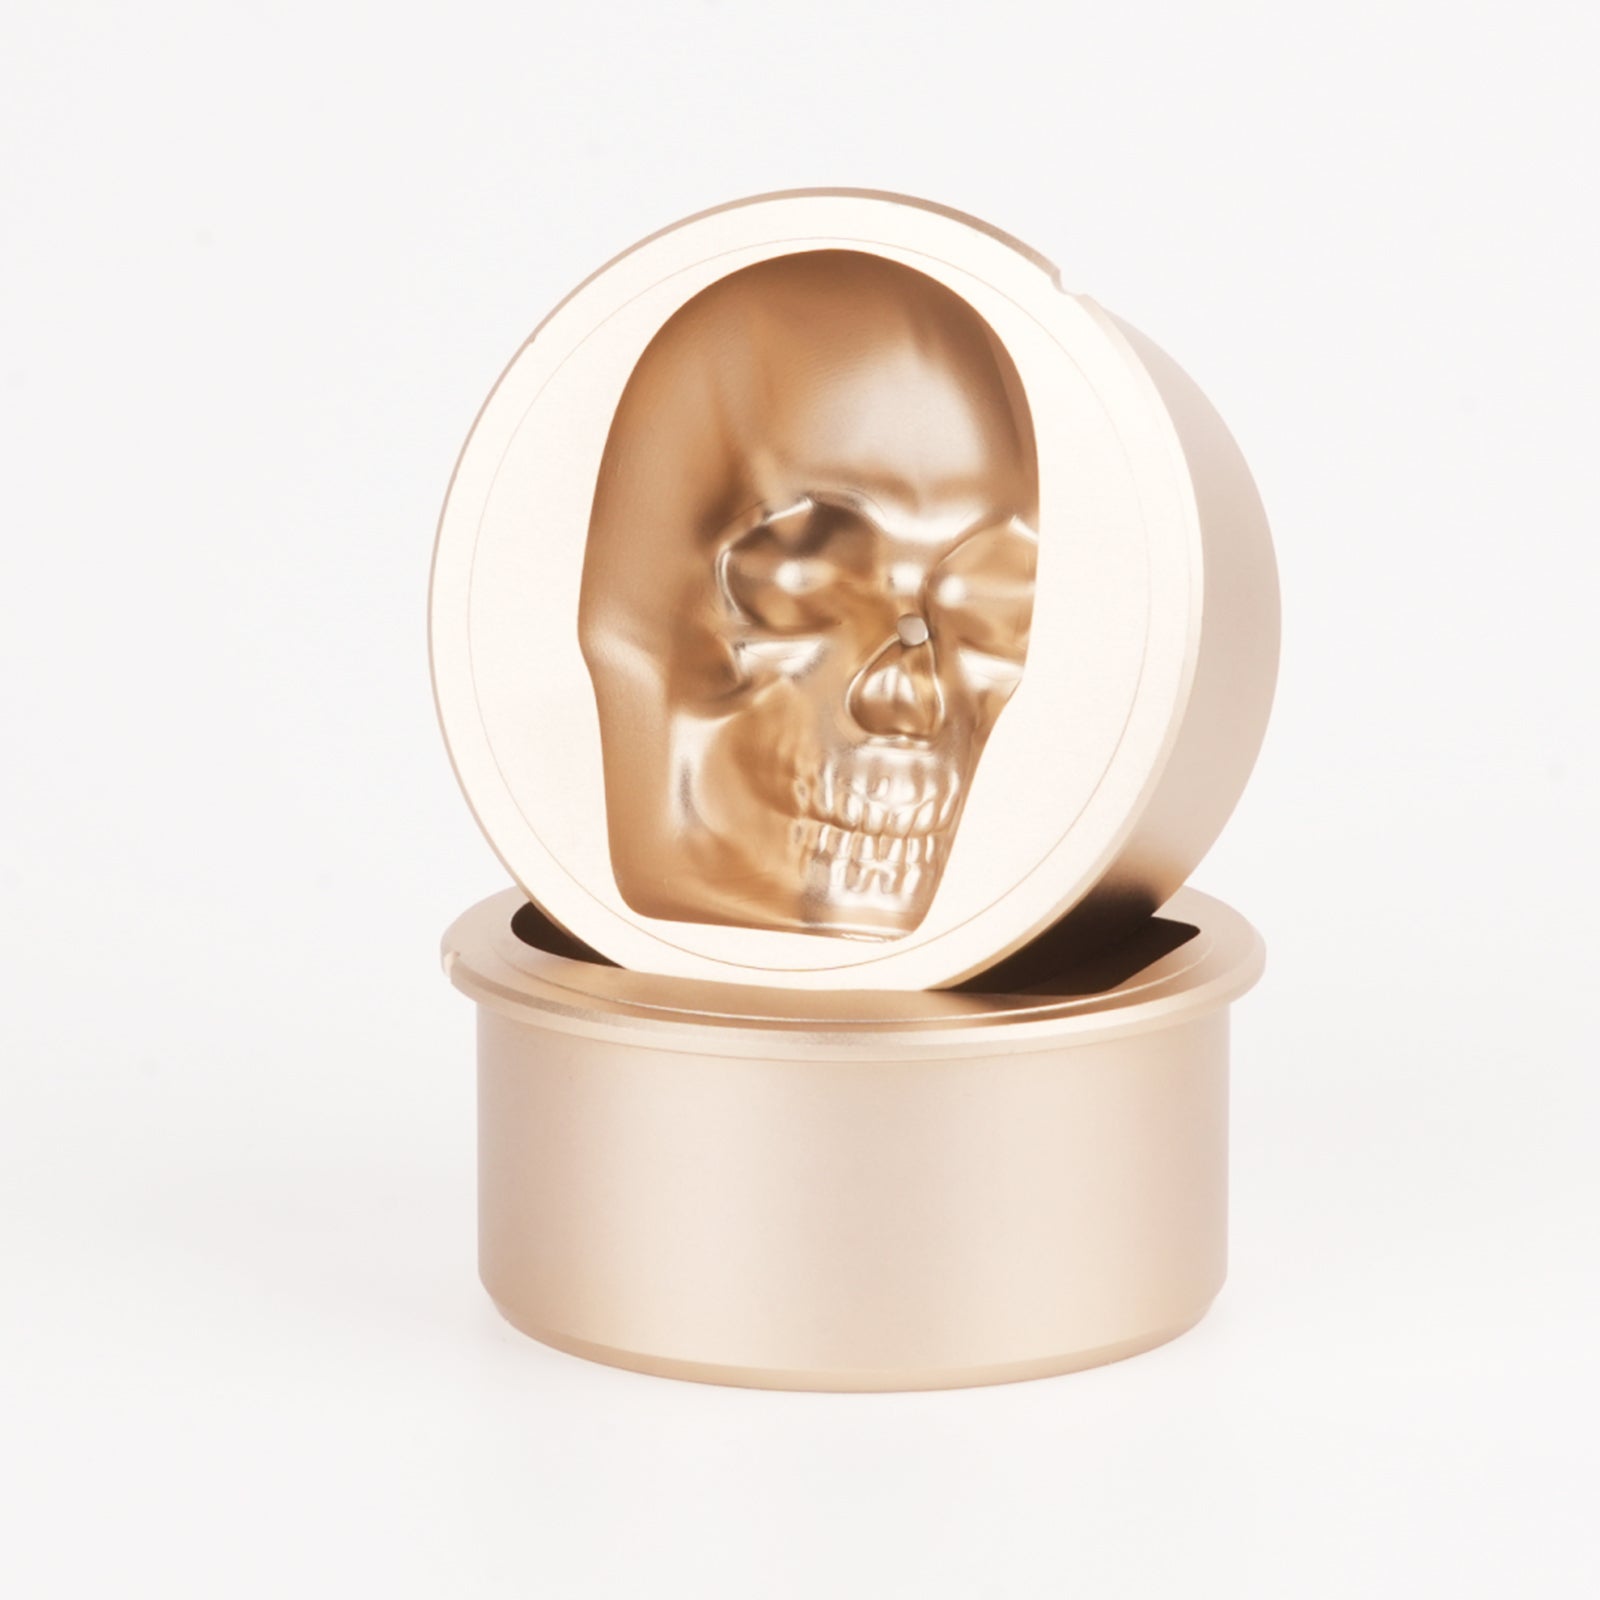
The GLAZER Press is a revolutionary heated aluminum ice shaper that allows you to reshape large ice blocks into beautiful designs like:
GLAZER Press Highlights:
- Heated to 100°F (37.8°C) for fast shaping
- Magnetic interchangeable inserts
- Shapes formed in as little as 2 minutes
- Perfect for personal bars, events, or professional mixology
Step 1: Preparing Your Water
To ensure crystal-clear ice balls, the water you use matters. Follow these preparation tips:
Use Distilled or Boiled Water
- Distilled water has fewer impurities that cause cloudiness
- Alternatively, boil tap water twice and let it cool before use
Cool to Room Temperature
- Let the boiled water sit uncovered for a few hours
- This removes air bubbles, which prevents cracks in the ice
Step 2: How to Properly Fill the Ice Ball Mold

Whether using silicone molds or other reusable molds to prep your ice, here's how to do it:
Filling Steps:
- Open the mold and inspect it for debris or dust
- Fill the mold slowly with the prepared water, stopping just before overflow
- Tap the mold gently to release trapped air bubbles
- Seal it tightly to prevent leakage in the freezer
Pro Tip: Place the mold on a flat surface before freezing to ensure even shape formation.
Step 3: Freezing the Mold
Proper freezing is key to clean, crack-free ice balls.
Freezing Tips:
- Freeze for 18–24 hours for full solidification
- Set your freezer between 0°F to -10°F (-18°C to -23°C)
- Avoid placing near the freezer fan as airflow may cause uneven freezing
Once frozen, remove the ice from the mold carefully to avoid cracks or damage to the shape.
Step 4: Using the GLAZER Press to Shape the Ice

The GLAZER Press turns your ice block into a perfectly shaped sphere (or other design) in just 2 minutes.
Steps to Use GLAZER:
- Preheat the GLAZER Press (auto-heats to 100°F / 37.8°C)
- Insert the desired mold insert (ball, diamond, heart, etc.)
- Place the ice block between the top and bottom halves
- Let gravity do the work – the press slowly closes and melts the shape
- After 2 minutes, open and remove the finished ice
This process delivers bar-quality ice with stunning visual appeal, ideal for whiskey, cocktails, and mocktails.
Pro Tips for Crystal-Clear Ice Balls
To maximize clarity and perfection, consider the following tips:
- Use directional freezing techniques (freeze from one side by insulating others)
- Remove ice slowly from molds to avoid stress fractures
- Store shaped ice in an airtight bag or container to prevent freezer burn
- Rinse under cold water before use to remove frost and enhance clarity
Why Choose GLAZER Press?
The GLAZER Press is not just another ice mold — it's an elegant and efficient machine that delivers consistent, flawless results. Here's what makes it outstanding:
- Customizable inserts: Choose from Ball, Diamond, Saturn, Heart, Skull
- Fast results: Shapes in under 2 minutes with no effort
- High-quality aluminum build with magnetic components
- Powerful yet compact: 600W performance in a 6×6×11 in (16×16×28 cm) form
- Versatile: Ideal for home, parties, or professional use
Summary Table
| Step | Action | Key Tip |
|---|---|---|
| 1. Prepare Water | Use distilled or boiled water | Let it cool to remove air bubbles |
| 2. Fill Mold | Fill slowly and seal tightly | Tap to release air pockets |
| 3. Freeze | Freeze for 18–24 hours | Keep mold level during freezing |
| 4. Shape Ice | Use GLAZER Press with insert | Preheat and let press work naturally |
| 5. Serve & Store | Rinse and serve or store properly | Avoid direct contact with warm surfaces |