


Everything You Need to Know About Clear Ice Molds
A clear ice mold helps you make ice that looks just like the kind you see at fancy bars—crystal clear and free of cloudiness. You might wonder why that matters. Clear ice makes your drinks look amazing, melts slower, and keeps flavors pure. People love using these molds for many reasons:
|
Reason for Using Clear Ice Molds |
Description |
|---|---|
|
Premium Beverage Experience |
Enjoy better drink quality. |
|
Aesthetic Appeal |
Drinks just look cooler. |
|
Cleaner Taste |
Less air means purer flavor. |
|
Slower Melting |
Ice lasts longer. |
|
Convenience |
Easy to use at home. |
You don’t need to be a pro. With the right tools and a few tips, you can make beautiful clear ice at home.
Key Takeaways
-
Clear ice makes your drink look nicer and fancy.
-
Clear ice keeps drinks cold for a longer time. It also stops drinks from getting watery.
-
Pick the best clear ice mold for good ice. Look for things like freezing in one direction and insulation.
-
Use distilled or boiled water to get clear ice. This helps keep out dirt and other stuff.
-
Clean your ice molds often to get the best ice. Keep them in good shape for nice ice.
Clear Ice Mold Basics
What Is a Clear Ice Mold
A clear ice mold is a tool that helps you make see-through ice cubes. You might notice these in fancy bars, but you can use them at home. These molds come in many shapes and sizes. They all help you make clear ice for your drinks.
Clear ice molds are made from different materials. Each material has good and bad points:
|
Material |
Advantages |
Disadvantages |
|---|---|---|
|
Plastic |
Light, strong, cheap, and simple to clean |
Can break easily after a while |
|
Stainless Steel |
Strong, clean, and keeps cold well |
Heavy and costs more |
|
Silicone |
Bends easily, does not stick, easy to clean |
More expensive than plastic |
|
Aluminum |
Light and does not rust |
Can react with some things |
|
Copper |
Keeps cold well and kills germs |
Needs to be polished often, costs more |
How Clear Ice Differs from Regular Ice
You might ask why regular ice looks white but clear ice looks like glass. The answer is in the way the ice freezes.
Clear ice is see-through because it freezes in a special way. This makes it better for your drinks. Regular ice looks cloudy because air and dirt get stuck inside when it freezes fast. This makes the ice weak. That is why cloudy ice melts quickly and makes your drink watery before you finish it.
Here is a comparison:
|
Type of Ice |
Freezing Process Description |
Resulting Structure |
|---|---|---|
|
Clear Ice |
Freezes slowly and pushes out dirt and air |
Thick, pure, and see-through ice |
|
Regular Ice |
Freezes fast and traps air and minerals |
Cloudy, weak, and full of holes |
Why Clear Ice Matters
You might think all ice is the same, but the kind of ice you use matters a lot. Clear ice makes your drink taste better in many ways:
-
Clear ice has less stuff in it, so your drink tastes fresh.
-
Regular ice can give your drink strange tastes and smells.
-
Cloudy ice melts fast and makes your drink watery.
-
Clear ice keeps your drink cold longer and looks cool.
Bartenders like clear ice because it makes drinks look fancy and keeps the taste just right. When you use a clear ice mold, your ice melts slowly and does not change the flavor. That is why many people use clear ice molds at home now.
Benefits of Crystal-Clear Ice
Visual Appeal in Cocktails
When you drop crystal-clear ice into your drink, you notice the difference right away. Your cocktail looks elegant and stands out. The ice lets the bright colors and fresh garnishes shine through. You get a drink that looks like it came from a high-end bar, even if you made it at home.
-
Crystal-clear ice adds elegance and sophistication to drinks.
-
It lets the colors and garnishes in your cocktail pop.
-
Cloudy ice can make your drink look dull or messy.
If you want your drinks to impress your friends or just look great for yourself, crystal-clear ice makes it easy.
Slower Melting and Less Dilution
Crystal-clear ice does more than just look good. It melts slower than regular ice because it has a denser structure and fewer impurities. This means your drink stays cold longer and does not get watered down as fast. You can enjoy your cocktail at your own pace without worrying about losing flavor.
Tip: When you use crystal-clear ice, you keep the taste and balance of your drink just the way you like it.
Taste and Presentation
You might not think ice changes the taste of your drink, but it does. Crystal-clear ice is free from air bubbles and impurities. This helps it melt slowly and keeps your drink tasting fresh. Many bartenders say that guests notice the difference right away. When you use crystal-clear ice, you get a pure taste and a beautiful look in every glass.
-
Crystal-clear ice keeps your drink from tasting watered down.
-
It helps you enjoy the real flavor of your favorite spirits.
-
Your drink looks and tastes better, making every sip special.
Choosing the Best Clear Ice Mold
If you want to make clear ice at home, picking the right clear ice mold is important. There are some things you should check before buying one. Let’s look at what matters most so you get good ice every time.
Key Features to Look For
To pick a clear ice mold, look for features that help you make clear, strong ice. The way the mold freezes water is very important. You need a mold that lets you control how and how fast the water freezes.
The best molds let you freeze water slowly and in one direction. This helps push dirt and air out of the ice. If you freeze water too fast, dirt and air get stuck inside. That makes the ice cloudy and weak.
Here are some things to look for:
-
Directional freezing helps push out air and dirt, making ice clear.
-
Insulation keeps the sides and bottom cold, so water freezes from the top down.
-
Using distilled or boiled water can help, but freezing slowly is most important.
-
Easy release means you can get the ice out without trouble. Silicone molds are good for this.
-
Mold material matters. Silicone bends and is easy to use. Plastic and metal are strong but can be harder to handle.
You can try different molds to see which one works best for you. Some people like to test a few before choosing their favorite.
Mold Size and Capacity
Think about what drinks you like and how many people you serve. Bigger molds make bigger cubes or balls. These melt slower and keep your drink cold longer.
-
Large molds make ice that melts slowly and keeps flavor strong.
-
Big round ice melts slow, which is good for drinks like whiskey.
-
Using boiled or distilled water and freezing slowly makes ice even clearer.
If you have parties, pick a mold that makes many cubes at once. For one drink, a mold that makes one or two big cubes is fine. Always check how much ice the mold can make so you don’t run out.
Mold Covers and Insulation
Covers and insulation are important when picking a clear ice mold. Insulation helps control how the ice freezes. Covers keep out dust and stop the ice from shrinking in the freezer.
-
Directional freezing means ice freezes from one side, usually the top. This pushes dirt and air to the bottom, making ice clear.
-
Clear ice molds use insulation on the bottom and sides. This makes water freeze in one direction and pushes out air and dirt.
-
Mold covers keep your ice clean and stop it from smelling like the freezer.
For the best ice, pick a mold with a tight cover and thick insulation. This helps you get clear, strong ice every time.
Tip: For the clearest ice, use distilled or boiled water and freeze it slowly in a mold with good insulation and a cover.
If you follow these tips, making clear ice at home is much easier. Try different molds to see which one you like best.
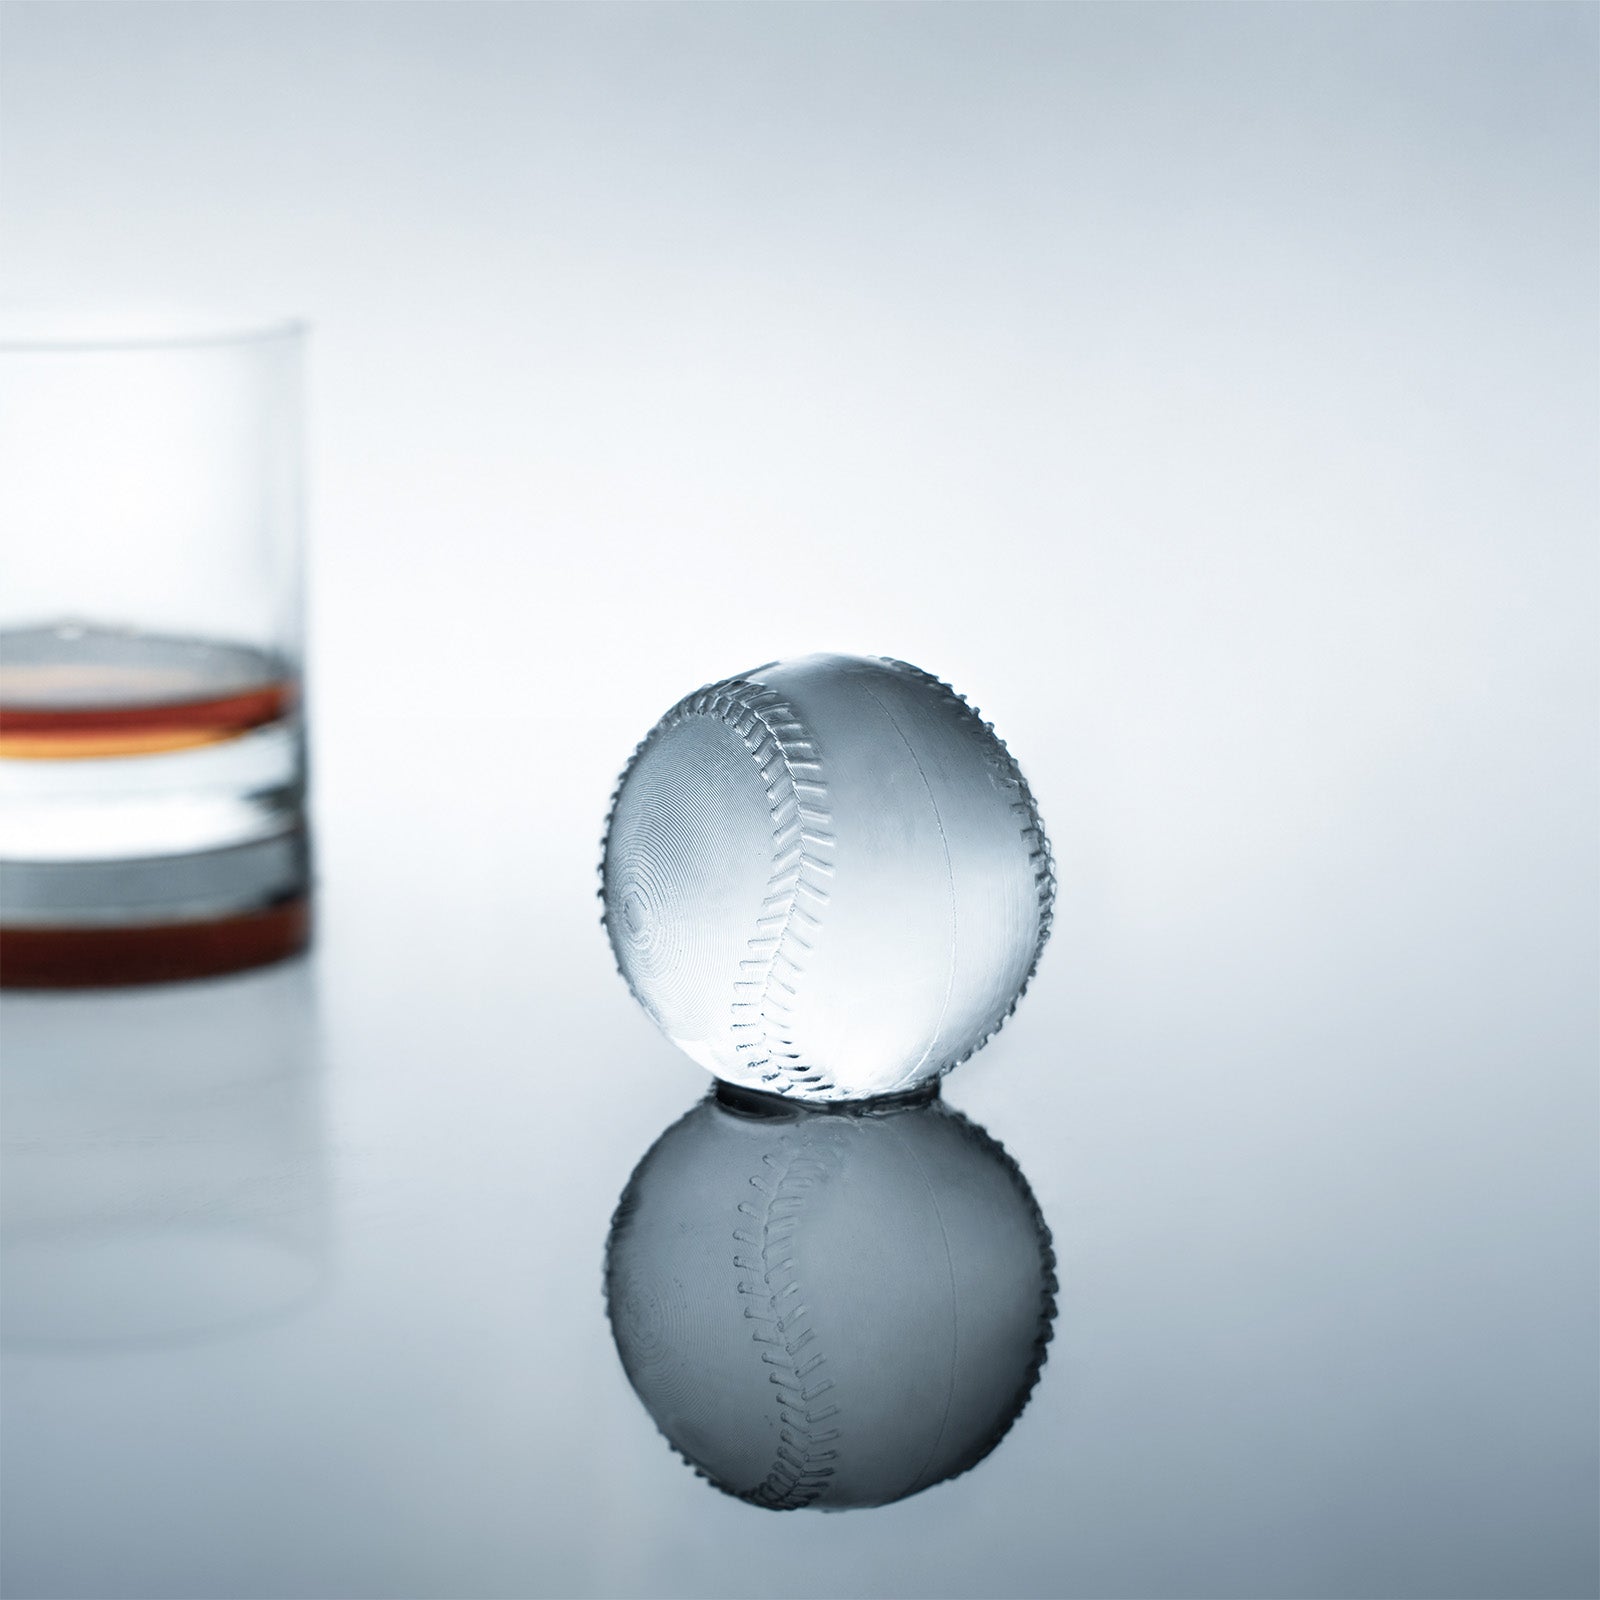
Best Ice Cube Molds for Whiskey
Cube vs. Sphere Molds
When you pour whiskey over ice, the shape of the ice makes a big difference. You might wonder if you should pick cubes or spheres. Each shape has its own perks.
|
Shape |
Advantages |
Disadvantages |
|---|---|---|
|
Cube |
Maximizes glass contact; stacks perfectly in an old-fashioned. |
May melt faster than spheres. |
|
Sphere |
Dramatic appearance; melts slightly slower. |
Exposes less surface area. |
Cubes fit well in most whiskey glasses. They look classic and stack easily. Spheres, on the other hand, look fancy and melt slower. This means your whiskey stays cold without getting watered down too fast.
Tip: Spheres are great for showing off at parties. Cubes are perfect for everyday sipping.
If you want the best ice cube molds for whiskey, think about your favorite glass and how you like to enjoy your drink.
Specialty Shapes for Whiskey
You can find more than just cubes and spheres. Some molds make large blocks or unique shapes. These specialty molds help your whiskey stay cold and look cool at the same time.
-
Large ice molds create big pieces that melt slowly and chill your whiskey without watering it down.
-
Clear ice molds make dense, see-through ice that looks amazing in your glass.
-
Some whiskey fans use chilling balls or cooling coasters. These keep your drink cold without melting at all.
The best ice cube molds for whiskey often include these specialty shapes. They let you try new ways to enjoy your favorite drink.
Features for Whiskey Lovers
You want your ice to look good and work well. The best ice cube molds for whiskey have features that make your life easier.
-
Easy-release designs help you pop out the ice without breaking it.
-
Insulated molds freeze ice slowly, making it clearer and stronger.
-
Covers keep out freezer smells and protect your ice.
-
Some molds let you make more than one shape, so you can switch things up.
If you love whiskey, you will enjoy trying different molds and shapes. You can find a mold that fits your style and makes every glass special.
Best Large Ice Cube Molds for Entertaining
Large Cubes vs. Blocks
When you plan a party, you want ice that lasts. Large cubes and ice blocks both work well, but they have some differences. Large cubes look great in drinks and chill them fast. Ice blocks melt even slower and can keep drinks cold for hours. You might wonder which one is better for your next gathering.
Here’s a quick look at how they compare:
|
Ice Type |
Melting Rate |
Suitability for Entertaining |
|---|---|---|
|
Large Ice Blocks |
Slower, lasts up to 10 hours longer |
Keeps drinks cold without dilution |
|
Traditional Ice Cubes |
Faster, can dilute drinks |
Less suitable for long events |
If you want your drinks to stay cold without getting watery, ice blocks are a smart choice. Large cubes still work well for most cocktails and look stylish in any glass. The best large ice cube molds let you make both shapes, so you can pick what fits your party.
Capacity for Parties
You don’t want to run out of ice when friends come over. The best large ice cube molds help you make enough ice for everyone. Some molds make just two or four cubes at a time. Others can make a whole tray of big cubes or blocks. If you host big parties, look for molds with higher capacity.
-
Stackable molds save space and let you freeze more ice at once.
-
Some molds let you prepare ice ahead of time and store it in the freezer.
-
You can even find molds that make jumbo blocks for punch bowls or coolers.
When you choose the best large ice cube molds, think about how many guests you usually have. More capacity means less stress and more fun.
Storage and Convenience
Storing large ice cubes can be tricky. You need space in your freezer and a way to keep the ice clean. The best large ice cube molds often come with lids. These lids stop freezer smells from getting into your ice. They also keep the cubes from sticking together.
Tip: Use a container or bag to store extra ice cubes. This keeps them fresh and ready for your next party.
Some molds are made of silicone, which makes it easy to pop out the ice. Others use sturdy plastic or metal. Pick the best large ice cube molds that fit your freezer and your style. You’ll always have clear, slow-melting ice on hand for any event.
How to Make Crystal-Clear Ice at Home
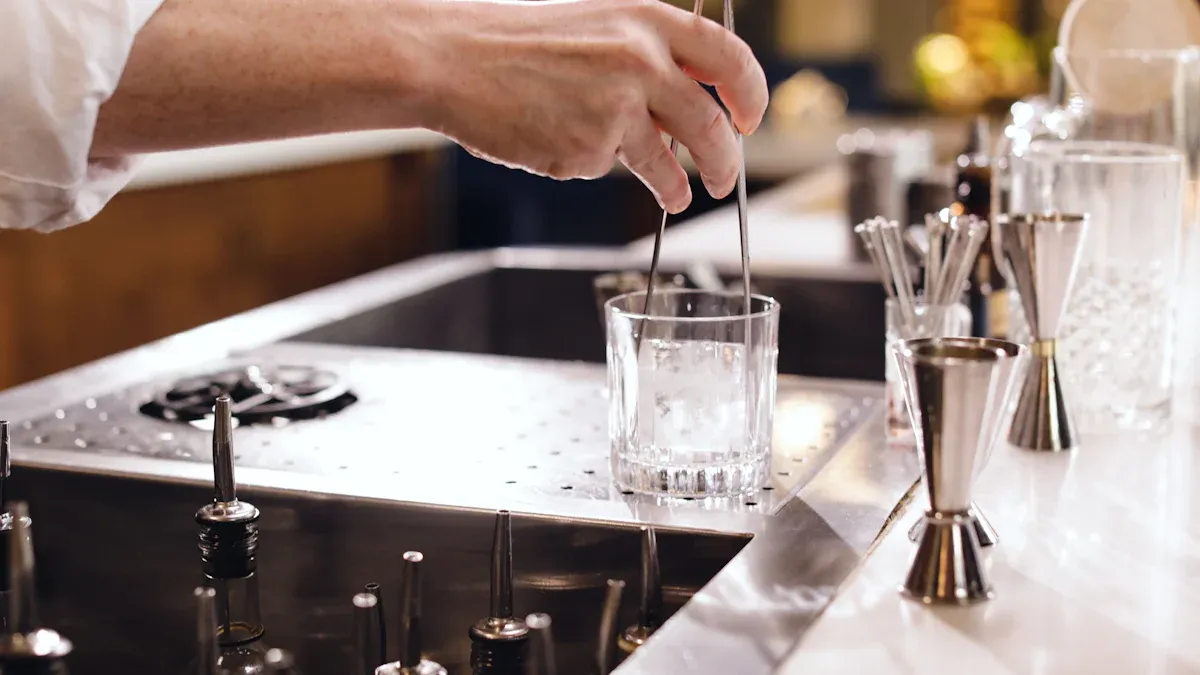
Making crystal-clear ice at home might sound tricky, but you can do it with a few simple steps. You just need the right water, a good mold, and a little patience. Let’s walk through the process together.
Preparing Water and Mold
You want your ice to look like glass, so start with clean water and a quality mold. Here’s how you get set up:
-
Choose distilled or filtered water. This helps reduce minerals and makes your ice clearer.
-
Boil the water and let it cool. Boiling removes air bubbles that can make ice cloudy.
-
Press the lining and seal your mold. Make sure it sits flat and fits snugly.
-
Fill the mold slowly with your cooled water. Stop before you reach the very top.
-
Insert the mold into its base if it has one. Lower it gently to avoid spills.
-
Place the filled mold on a flat surface in your freezer.
Tip: Pre-chill your mold before filling it. This helps prevent thermal shock and gives you more even freezing.
Most ice molds designed for clear ice use these steps. They make the process easy, but you still need to give the ice time to freeze fully.
Using Directional Freezing
Directional freezing is the secret to crystal-clear ice. You want the water to freeze from one direction—usually from the top down. This pushes air and impurities to the bottom, leaving the top part clear.
You can set up directional freezing at home with a simple trick:
Use a small hard-sided cooler without a lid. Fill it with water and place your mold inside. The cooler’s insulation keeps the sides and bottom from freezing too fast, so the ice forms from the top down.
Let the cooler sit in your freezer for about 24 hours. Don’t disturb it during this time. The slow, controlled freezing helps you get that perfect, see-through ice.
Demolding and Storing Ice
Once your ice is frozen, you want to keep it clear and crack-free. Here’s how you do it:
-
Take the mold out of the freezer and let it sit at room temperature for a minute or two. This makes it easier to release the ice.
-
Open the mold carefully. Don’t force it—gentle pressure works best.
-
Handle the ice with care. Sudden temperature changes or rough handling can crack large cubes or spheres.
-
Store your clear ice in a clean, airtight container or bag. This keeps out freezer smells and protects the ice’s shape.
Here’s a quick table of best practices for demolding and storing your clear ice:
|
Best Practice |
Description |
|---|---|
|
Use Distilled or Filtered Water |
Reduces minerals and keeps your ice clear. |
|
Pre-Chill the Mold |
Helps prevent cracks and promotes even freezing. |
|
Control Freezing Speed |
Slow freezing gives you clearer ice. |
|
Handle with Care During Release |
Avoid sudden changes in temperature or force that can crack the ice. |
|
Maintain Mold Hygiene |
Clean your ice molds regularly to prevent buildup and keep your ice tasting fresh. |
Note: Patience pays off. Let your ice freeze for a full 24 hours for the best results.
With these steps, you can make crystal-clear ice at home that looks and tastes amazing. Try different ice molds and see which ones give you the clearest results. Your drinks will look professional, and your guests will notice the difference.
Troubleshooting Clear Ice Mold Issues
Cloudy Ice Solutions
Cloudy ice can ruin the look of your drink. You want clear ice cubes, but sometimes you see white spots or haze. Here are some reasons why this happens and how you can fix it:
-
Impurities in water make ice cloudy. Try using filtered or distilled water for perfect ice formation.
-
Air bubbles get trapped when water freezes too fast. Slow down the freezing process and use directional freezing to push air and impurities away.
-
If you don’t clean your ice mold or ice maker, bacteria and mold can sneak in. Clean your mold regularly to keep your ice fresh.
-
Old ice cubes absorb odors and taste bad. Always use fresh ice and store it in a clean container.
Tip: If you want pro techniques for bar-quality clear ice, boil your water before freezing and let it cool. This removes air and helps you get crystal-clear results.
Preventing Cracks and Splits
You might notice cracks or splits in your clear ice cubes. This can happen during freezing or when you take the ice out of the mold. Try these steps to keep your ice whole:
-
Chill your filtered water in the fridge before you pour it into the mold.
-
Pre-chill your mold for about 30 minutes. This helps prevent thermal shock.
-
Pour water slowly and fill the mold to the brim. Avoid air gaps.
-
Place the mold in the coldest part of your freezer and leave it undisturbed.
-
After freezing, let the mold sit on the counter for a few minutes. The edges will melt slightly, making it easier to remove the ice.
-
Temper the ice by letting it rest at room temperature for 5–10 minutes before cutting or serving.
Note: Running the mold under cool tap water for a few seconds can help release the ice without cracks.
Mold Leaks and Maintenance
Leaks in your clear ice mold can cause messy spills and ruin your ice. You can prevent leaks and keep your mold in good shape with these tips:
-
Check hoses, drains, and water lines for cracks or loose connections.
-
Fix leaks right away to avoid water pooling.
-
Make sure your mold’s drainage system works well and stays clean.
-
Clean up spills quickly to stop moisture from building up.
-
Schedule regular inspections to catch hidden leaks early.
-
Keep your mold in a well-ventilated spot so it stays cool and dry.
Keeping your mold clean and checking for leaks helps you get perfect ice formation every time.
Caring for Your Clear Ice Mold
Cleaning Tips
You want your clear ice to look perfect every time. Clean molds help you get there. If you skip cleaning, you might see mineral spots or taste something odd in your drinks. Here’s how you can keep your molds fresh and ready:
-
Wash your ice molds after every use. This stops mineral deposits from building up.
-
Soak the molds in warm water with a little mild cleanser. Let them sit for a few minutes.
-
Use a small brush to gently scrub away any leftover spots or residue.
-
Rinse the molds well with clean water. Make sure no soap stays behind.
Tip: Clean molds make better ice. You’ll notice the difference in both taste and appearance.
Storage Advice
Storing your clear ice molds the right way keeps them in top shape. You don’t want dust or freezer smells to sneak in. Here are some easy steps:
-
Dry your molds completely before putting them away. Water left inside can cause mold or bad smells.
-
Store molds in a clean, dry spot. A kitchen drawer or cabinet works well.
-
If you keep molds in the freezer, use a sealed bag or container. This keeps out odors and protects the mold from damage.
A little care goes a long way. Your molds will stay clean and ready for your next batch of ice.
Extending Mold Life
You can make your clear ice molds last longer with a few simple habits. Treat them well, and they’ll keep making great ice for years.
|
Do This |
Why It Helps |
|---|---|
|
Clean after each use |
Prevents buildup and bad flavors |
|
Avoid harsh chemicals |
Keeps the material strong |
|
Don’t use sharp tools |
Stops scratches and cracks |
|
Store safely |
Prevents warping and breakage |
Remember: Gentle cleaning and careful storage help your molds last. Take care of them, and you’ll always have clear, beautiful ice for your drinks.
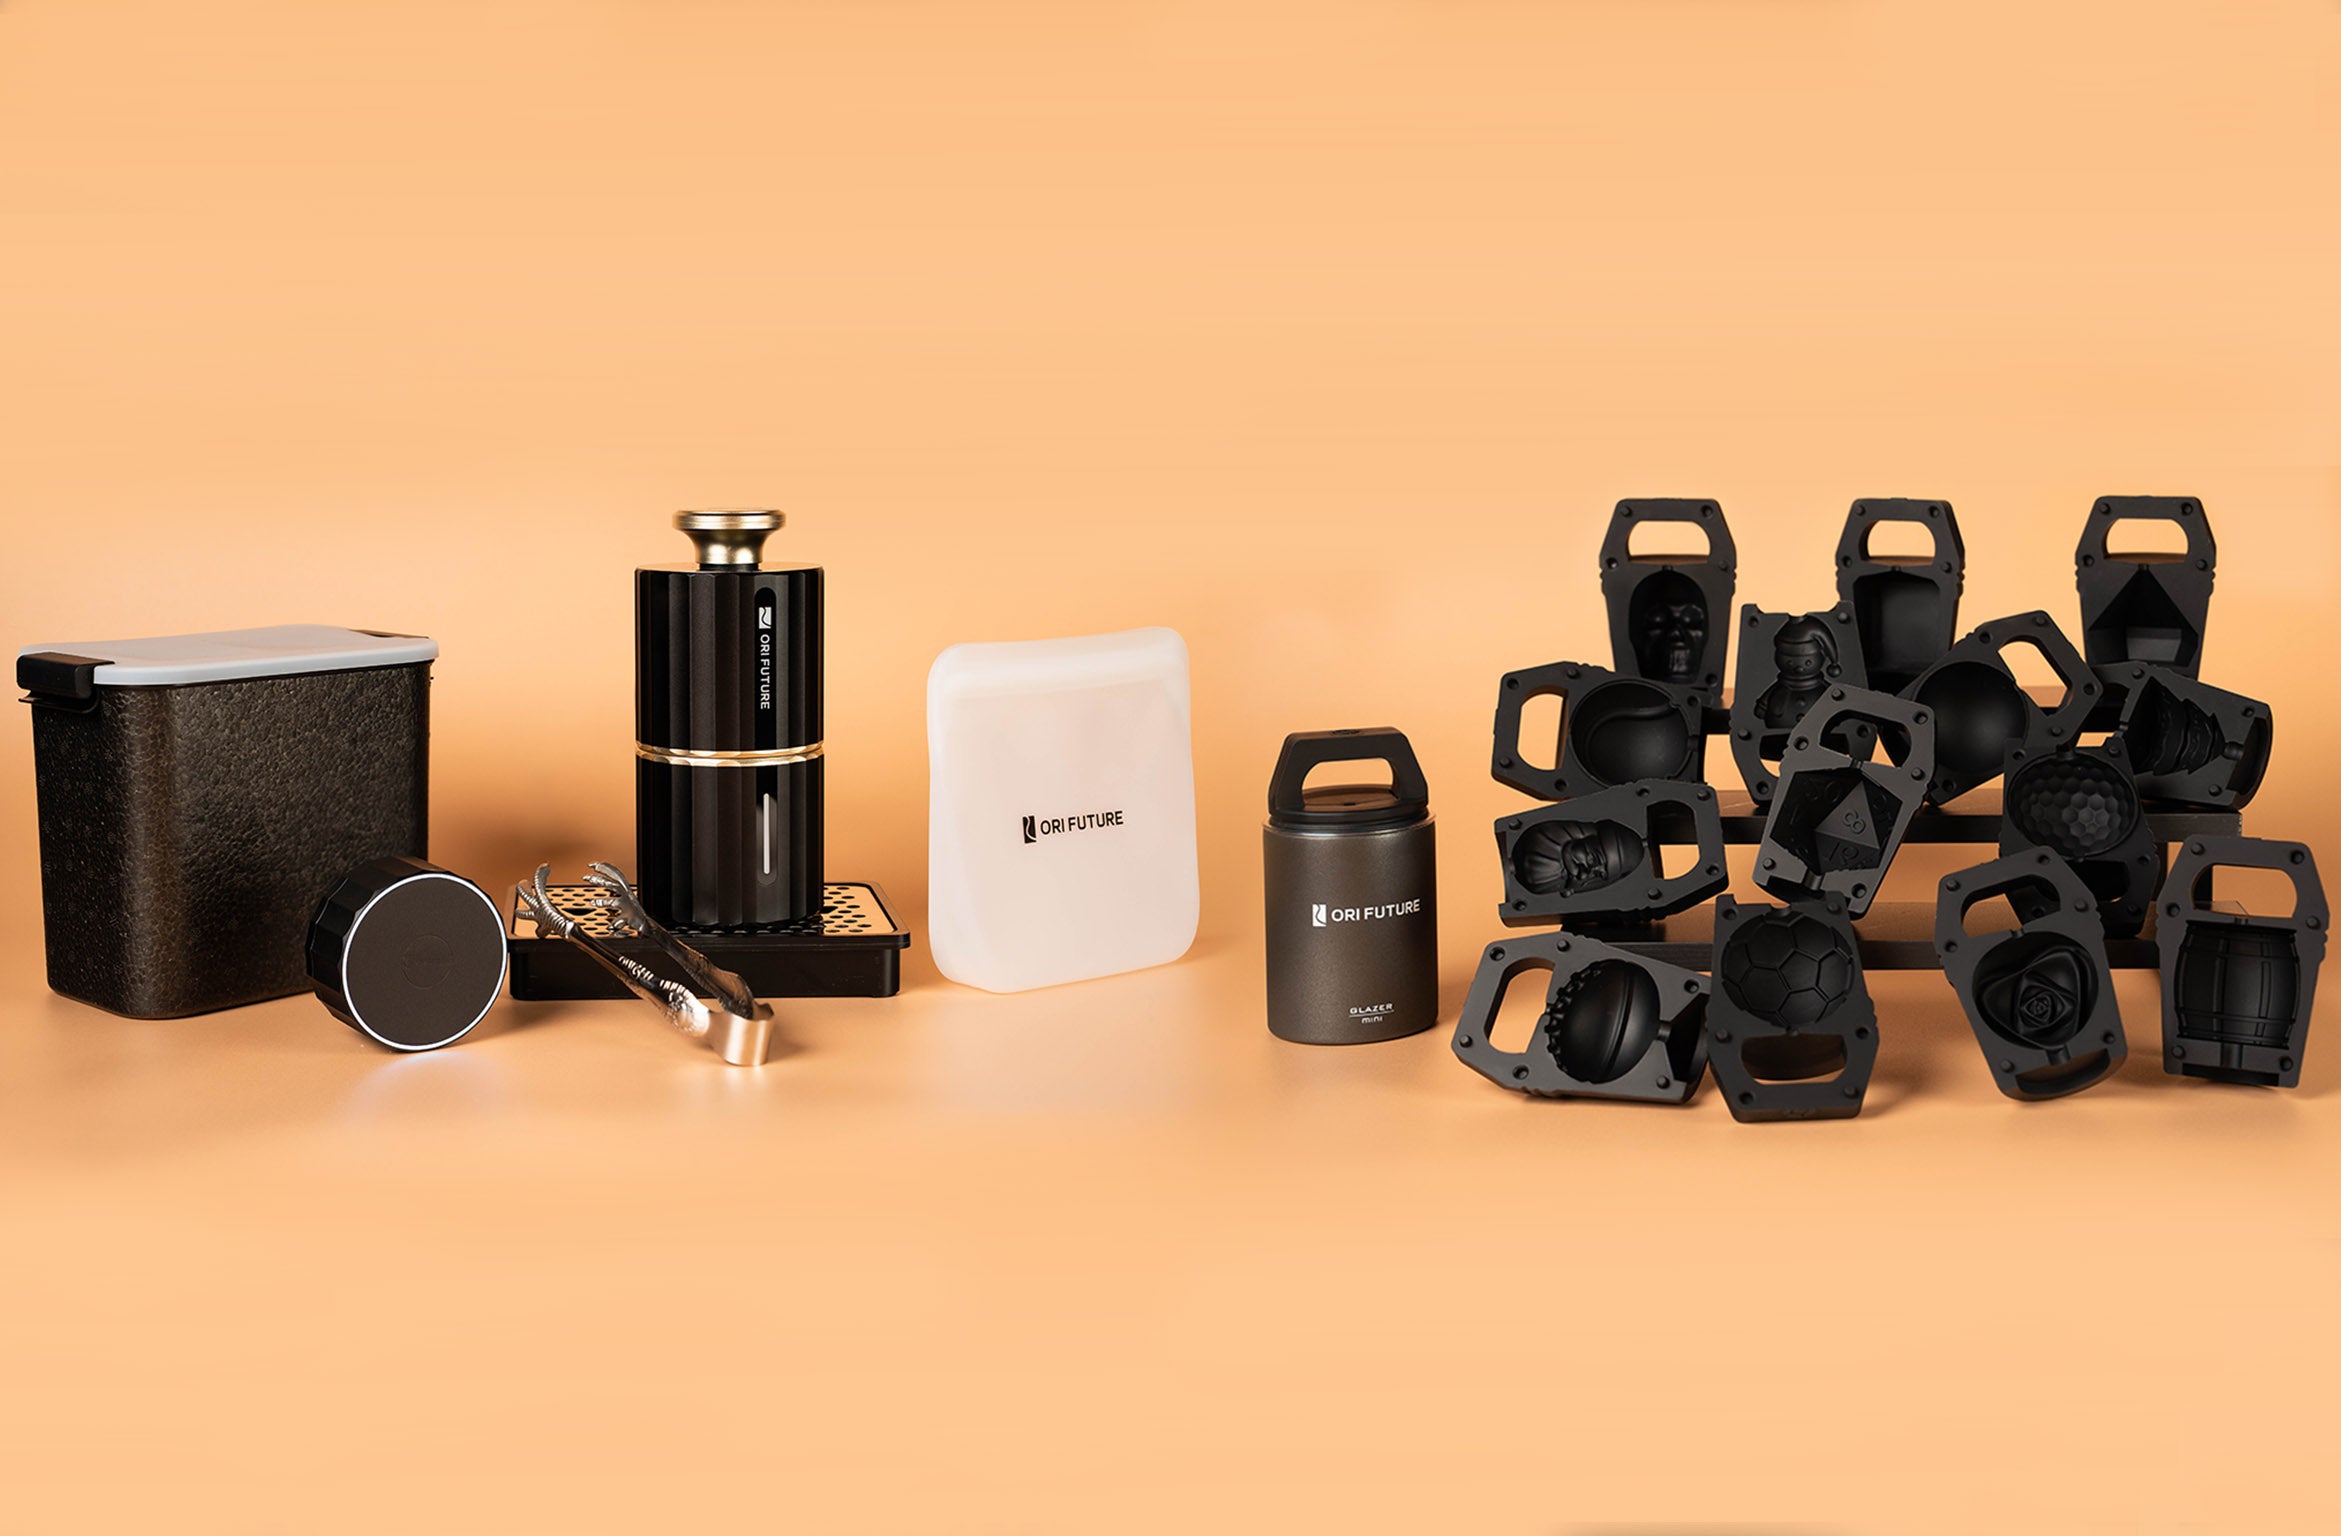
Using Clear Ice Molds with an Ice Press
What Is an Ice Press
An ice press is a cool tool that shapes your clear ice into perfect spheres or other fun shapes. You place a block of clear ice inside the press. The heavy metal top slowly melts and molds the ice using its own weight and warmth. In just a minute or two, you get a smooth, round ice ball that looks amazing in any drink.
You might see ice presses in fancy bars, but you can use one at home, too. They work best with clear ice because cloudy ice cracks or breaks apart. If you want to impress your friends or just enjoy a pro-style drink, an ice press is a fun gadget to try.
Pairing Molds and Presses
You need the right size and shape of clear ice for your ice press. Most presses work with large cubes or blocks. If your ice is too small, it won’t fill the press. If it’s too big, it won’t fit at all.
Here’s a quick guide:
|
Ice Mold Shape |
Best for Press? |
Notes |
|---|---|---|
|
Large Cube |
👍 Yes |
Fits most presses |
|
Small Cube |
👎 No |
Too small, melts too fast |
|
Sphere |
👎 No |
Already shaped, no need |
|
Block |
👍 Yes |
Cut to fit your press size |
Tip: Use a clear ice mold that makes cubes just a bit bigger than your press. You can trim the edges if needed.
Tips for Best Results
You want your ice spheres to look perfect every time. Try these tips:
-
Let your clear ice sit at room temperature for a few minutes before pressing. This helps prevent cracks.
-
Wipe off any frost or water drops before placing the ice in the press.
-
Press slowly. Don’t rush the process. The metal will do the work for you.
-
Clean your ice press after each use. This keeps your ice looking clear and tasting fresh.
-
Store finished ice balls in a sealed container to keep them from picking up freezer smells.
Note: Practice makes perfect. The more you use your ice press, the better your results will look!
You can make your drinks look and taste amazing with the right clear ice mold. Here’s what you get when you use clear ice at home:
-
Your cocktails look sleek and perfect for sharing.
-
Ice melts slower, so your drink stays cold and strong.
-
You taste pure flavors with no odd smells.
-
Every sip feels smooth and special.
-
Premium spirits shine with clear ice.
Try different molds and methods from this guide. You’ll see how easy it is to upgrade your home bar!
FAQ
How do you keep clear ice from cracking?
Let your ice sit at room temperature for a few minutes before removing it from the mold. This helps the ice adjust and prevents cracks. If you rush, the ice can break.
Can you use tap water for clear ice molds?
You can use tap water, but distilled or boiled water works better. Tap water has minerals and air that make ice cloudy. For the clearest results, always use filtered or distilled water.
Why does my clear ice sometimes taste funny?
Freezer smells or dirty molds can change the taste of your ice. Always clean your molds after each use. Store your ice in a sealed container to keep it fresh.
How long does it take to freeze clear ice?
Most clear ice molds need about 18 to 24 hours in the freezer. Bigger molds may take longer. For best results, let the ice freeze completely before removing it.
What shapes can you make with clear ice molds?
You can make cubes, spheres, blocks, and even fun shapes like diamonds or hearts. Some molds let you get creative with your ice. Try different shapes to see which ones you like best!
